
This article is part of the "Zadig IDP Plugin Development in Practice" series.
When implementing an internal developer portal (IDP) in an enterprise, the plugin mechanism allows engineering teams to quickly encapsulate frequently-used collaboration abilities—offering a unified entry point and experience.
In this installment, we take the "GitLab MR Viewer" as an example, providing a complete walkthrough on how to use the Zadig plugin system, from development to release, to build a unified code collaboration interface within your organization.
Stay tuned for more practical plugins in this series, such as Monitoring Alert Viewer and Project Management Panel, to empower your engineering team from multiple angles.
# Preview of the Final Result

Current supported capabilities:
- View Merge Requests assigned to me
- Filter by status (opened/closed/merged/all) and scope (assigned to me/created by me/all)
- Pagination & one-click jump to GitLab MR details
# Getting Started
Initial development of this plugin took about 2 days, but you won't need to repeat the process. By following this tutorial, you can finish in 1-2 hours and immediately experience Zadig plugin rapid development.
Basic Knowledge:
- Familiarity with JavaScript, HTML, CSS, etc., see MDN Web Frontend Developer (opens new window).
- Familiarity with Vue framework (opens new window).
- It's recommended to use Element UI (opens new window) for UI components.
Requirements:
- Node.js v20.0+
- Yarn v4.0+
- Zadig v4.0+
Others:
- Personal Access Token for your GitLab instance (with
apiandread_userpermissions)
First, install the Zadig IDP Plugin Development CLI and initialize your plugin scaffold:
# Install zadig-plugin-cli globally
yarn global add zadig-plugin-cli-dev
# Verify installation
zadig-plugin --version
zadig-plugin --help
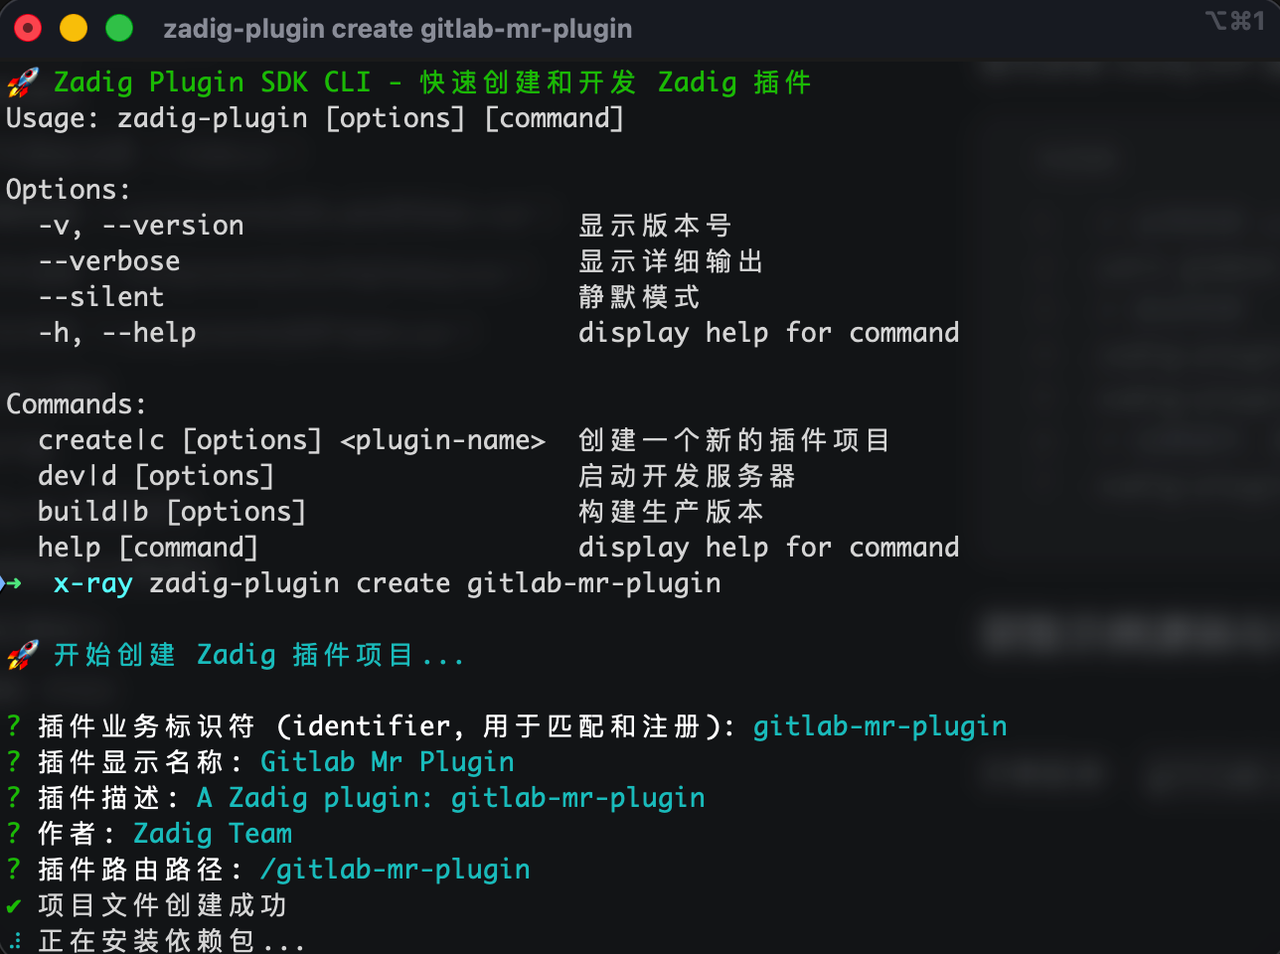
# Create a plugin scaffold (default is Page type)
zadig-plugin create gitlab-mr-plugin
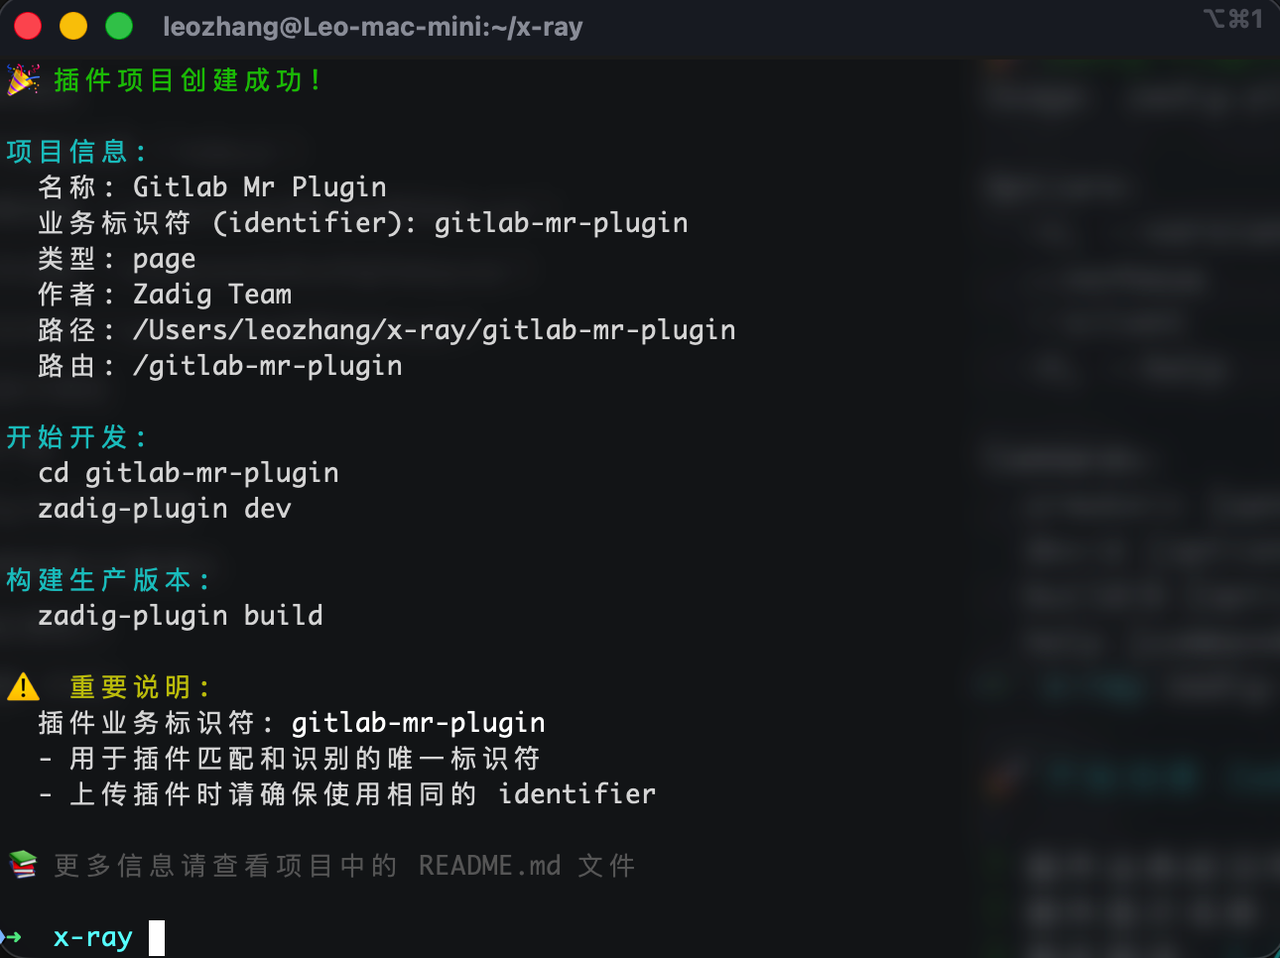
Enter the directory and start the development server. By default, it will display the Hello Plugin page, and you can modify the scaffold code from here.
      cd gitlab-mr-plugin
      zadig-plugin dev


# Core Code Overview
# Entry and Route Registration (index.js)
When the plugin is mounted, it registers the main route and defines manifest metadata (identifier, name, route, type, etc.). This is auto-generated by the SDK and can generally be left unchanged.
// Route registration (excerpt)
this.registerRoute({
  path: "/",
  component: WrappedComponent,
  meta: {
    title: "GitLab Merge Requests",
    icon: "el-icon-s-cooperation",
  },
});

// manifest (excerpt)
const manifest = {
  identifier: "gitlab-mr-plugin",
  name: "GitLab MR Viewer",
  version: "1.0.0",
  description: "View GitLab Merge Requests assigned to me",
  type: "page",
  route: "/gitlab-mr",
};
# Main Page Container (components/GitLabMRMain.vue)
- Uses local storage to save
gitlab_urlandgitlab_token fetchMergeRequestsfetches the MR list using the GitLab API, supporting state/scope/pagination- "Test Connection" pings
/api/v4/userto verify the token
// Fetch MR list (excerpt)
async fetchMergeRequests () {
  if (!this.isConfigured) {
    this.showTokenDialog = true
    return
  }
  const params = new URLSearchParams({
    state: this.filterState === 'all' ? undefined : this.filterState,
    scope: this.filterScope === 'all' ? undefined : this.filterScope,
    page: this.currentPage,
    per_page: this.pageSize,
    sort: 'desc'
  })
  Array.from(params.entries()).forEach(([k, v]) => {
    if (v === 'undefined' || v === undefined) params.delete(k)
  })
  const response = await fetch(`${this.gitlabUrl}/api/v4/merge_requests?${params}`, {
    headers: { Authorization: `Bearer ${this.gitlabToken}`, 'Content-Type': 'application/json' }
  })
  const data = await response.json()
  this.mergeRequests = data
  const totalHeader = response.headers.get('X-Total')
  this.total = totalHeader ? parseInt(totalHeader) : data.length
}

// Test connection (excerpt)
const response = await fetch(`${this.gitlabUrl}/api/v4/user`, {
  headers: { Authorization: `Bearer ${this.gitlabToken}`, 'Content-Type': 'application/json' }
})
# GitLab Config (components/ConfigDialog.vue)
- Two-way binding for URL/Token
- Event emissions
// Event emission (excerpt)
handleSave () {
  this.$emit('update:gitlab-url', this.form.gitlabUrl)
  this.$emit('update:gitlab-token', this.form.gitlabToken)
  this.$emit('save')
}
handleTest () {
  this.$emit('update:gitlab-url', this.form.gitlabUrl)
  this.$emit('update:gitlab-token', this.form.gitlabToken)
  this.$emit('test')
}
handleClear () {
  this.$emit('clear')
}
# Table and Interactions (components/MRTable.vue)
- Displays MR basic info per API
- Clicking a row jumps to MR details
<!-- MR display (excerpt) -->
<el-table
  :data="data"
  :loading="loading"
  @row-click="handleRowClick"
  style="width: 100%"
  stripe
>
  <el-table-column prop="title" label="Title" min-width="300">
    <template slot-scope="scope">
      <div class="mr-title">
        <span class="mr-iid">#{{ scope.row.iid }}</span>
        <span class="title-text">{{ scope.row.title }}</span>
      </div>
    </template>
  </el-table-column>

  <el-table-column label="Source Branch">
    <template slot-scope="scope">
      <span class="branch-name">{{ scope.row.source_branch }}</span>
    </template>
  </el-table-column>
  <el-table-column label="Target Branch">
    <template slot-scope="scope">
      <span class="branch-name">{{ scope.row.target_branch }}</span>
    </template>
  </el-table-column>

  <el-table-column label="Author">
    <template slot-scope="scope">
      <div class="author-info">
        <img
          v-if="scope.row.author.avatar_url"
          :src="scope.row.author.avatar_url"
          class="author-avatar"
          :alt="scope.row.author.name"
        />
        <span class="author-name">{{ scope.row.author.name }}</span>
      </div>
    </template>
  </el-table-column>

  <el-table-column prop="state" label="Status" width="100">
    <template slot-scope="scope">
      <el-tag :type="getStateType(scope.row.state)" size="small">
        {{ getStateText(scope.row.state) }}
      </el-tag>
    </template>
  </el-table-column>

  <el-table-column label="Created At" width="160">
    <template slot-scope="scope">
      {{ formatDate(scope.row.created_at) }}
    </template>
  </el-table-column>

  <el-table-column label="Updated At" width="160">
    <template slot-scope="scope">
      {{ formatDate(scope.row.updated_at) }}
    </template>
  </el-table-column>
</el-table>
# Build & Test
You can use zadig-plugin dev for real-time preview during development.
Debugging tips:
- Open browser developer tools and watch Console & Network tabs
- If GitLab access fails, first use "Config → Test Connection" to check URL/Token/Permissions
After successful local debugging, you can build the production version:
# Build for production
zadig run build
After the build, plugin.js will be generated in the dist/ directory—this is what you'll upload to Zadig.
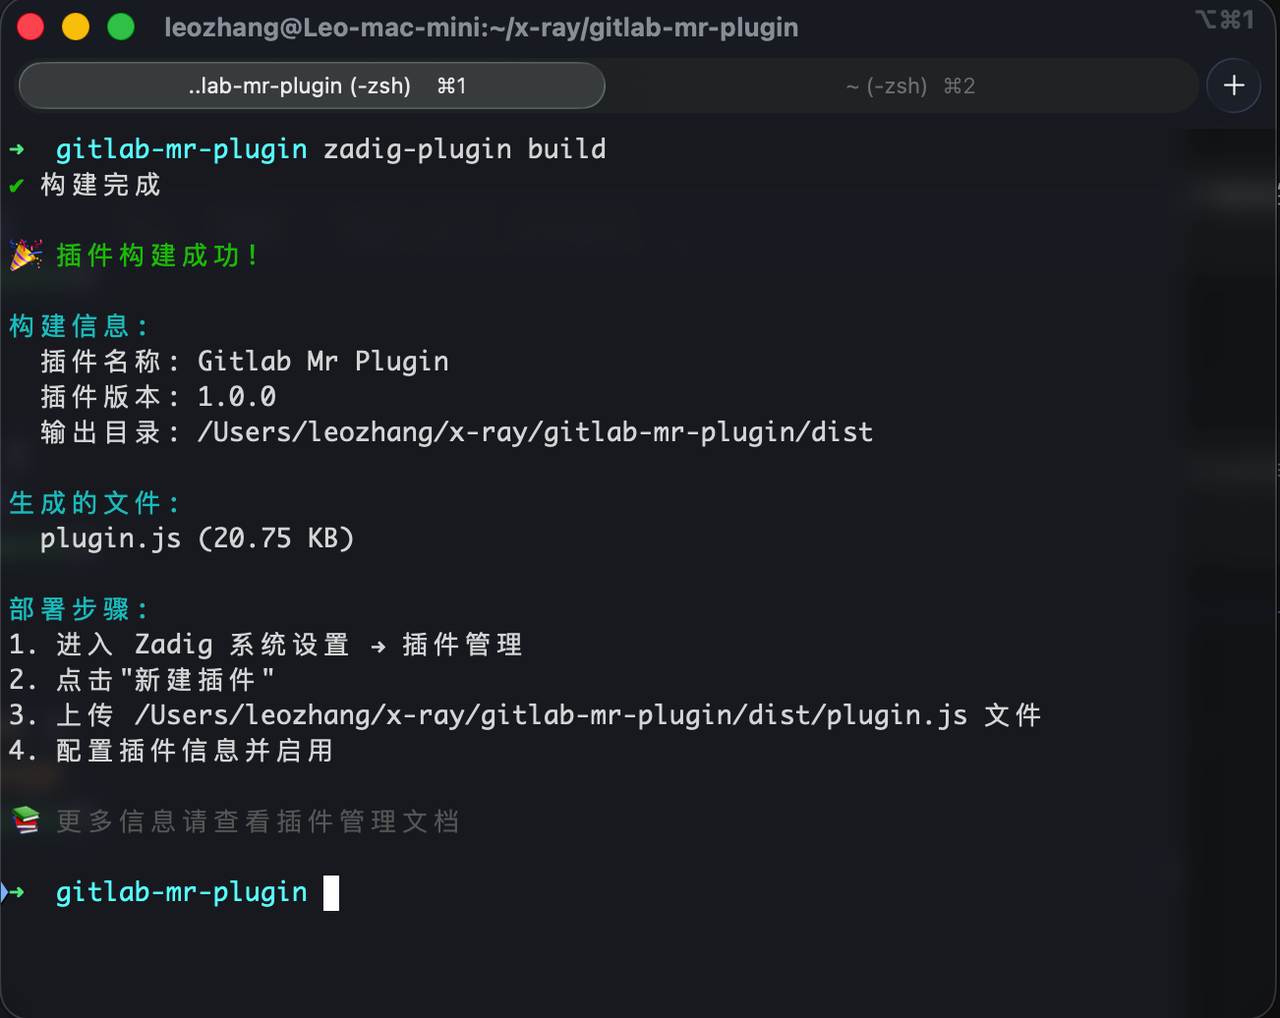
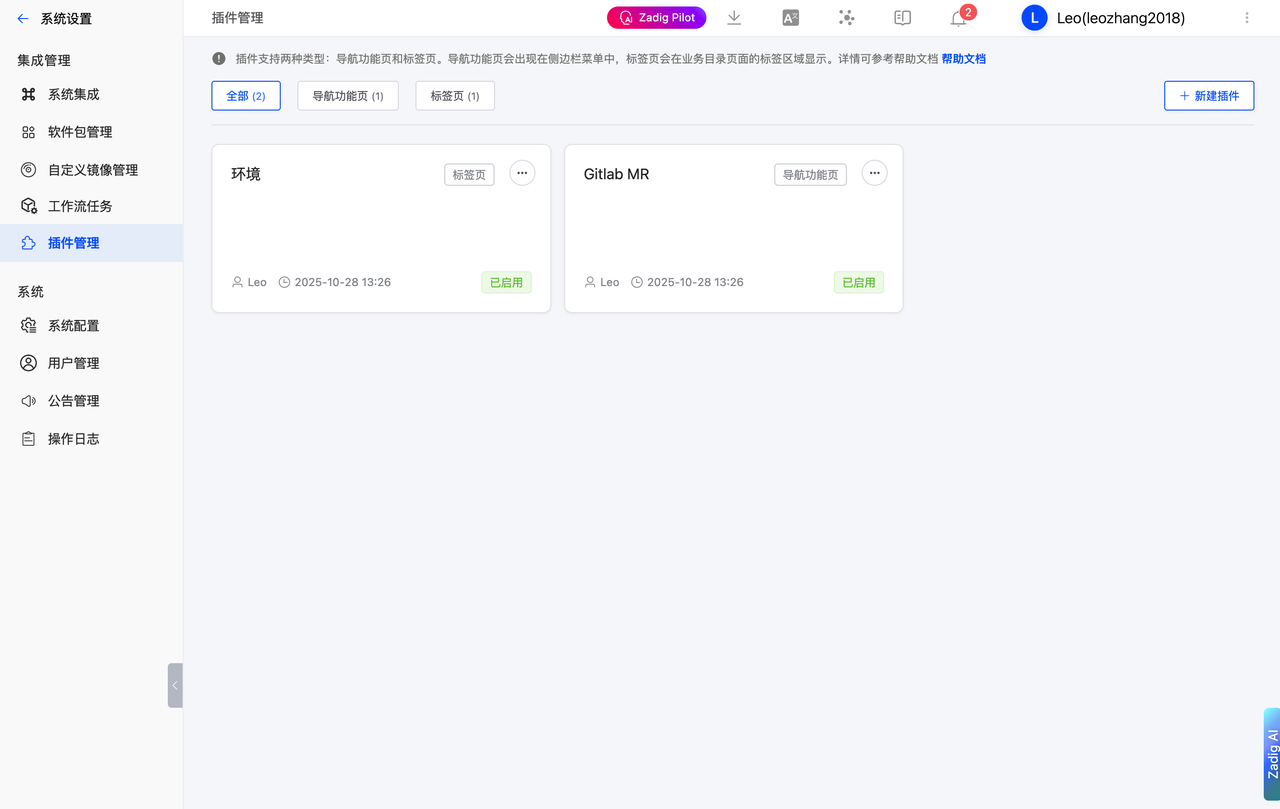
# Uploading and Publishing in Zadig
Log in to Zadig → go to "System Settings → Plugin Management"
Click "New Plugin" and fill in:
- Plugin Name: GitLab MR Viewer
- Plugin Type: Navigation Page (Page)
- Route Path:
/gitlab-mr-plugin - Plugin Description: View GitLab Merge Requests assigned to me
- Plugin Status: Enabled
- Upload build artifact:
dist/plugin.js
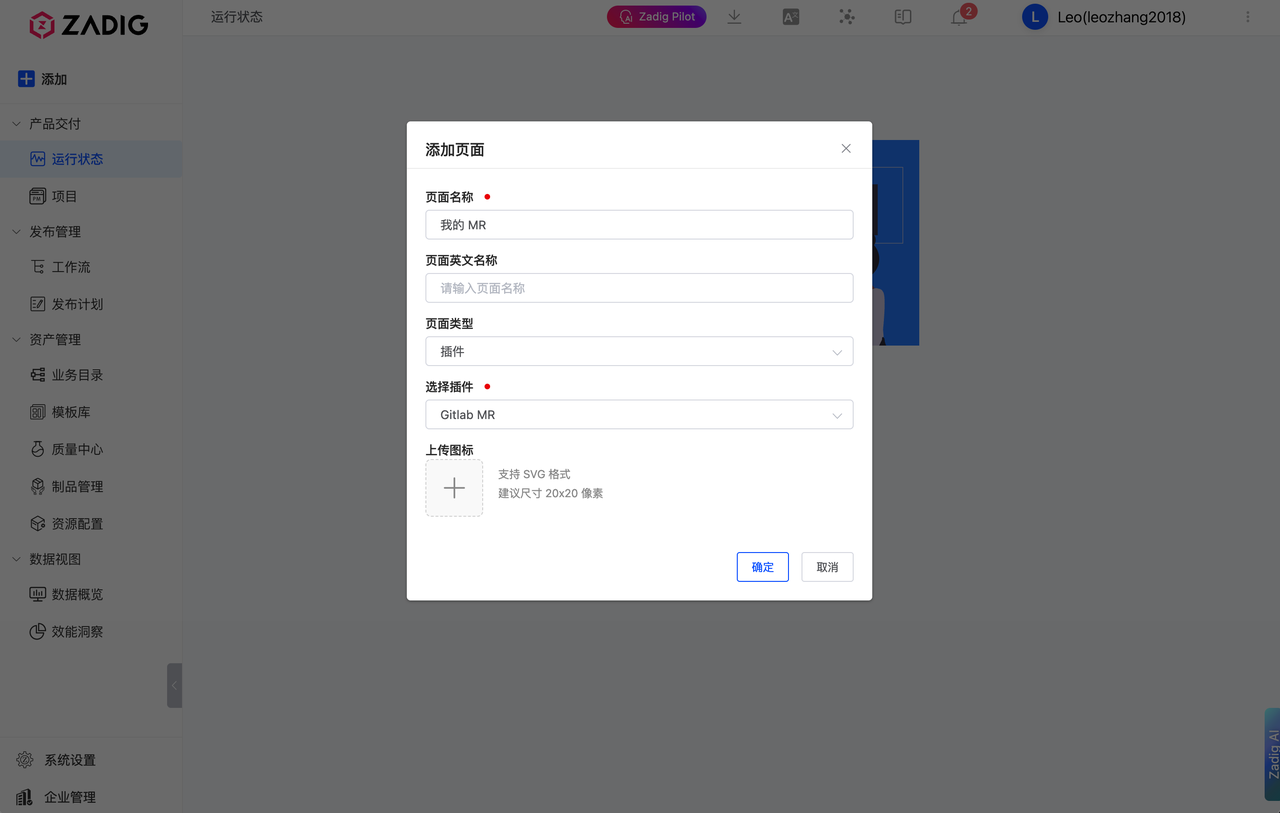
Go back to the main sidebar, click "Add Page", select type "Plugin", and pick the plugin you just created


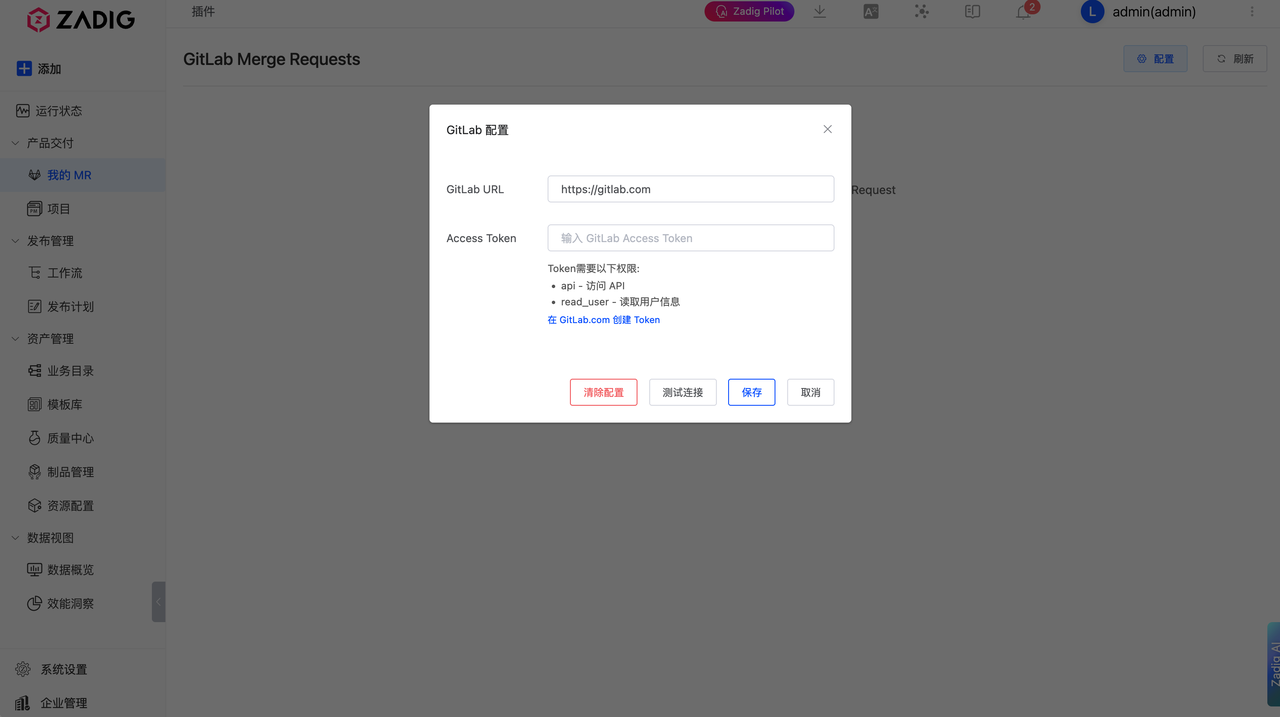
# Configuration and Feature Demonstration
Open the plugin page and click "Config" in the upper right
Fill in:
GitLab URL:
- For GitLab.com: enter
https://gitlab.com - For self-hosted instances: enter
https://gitlab.example.com(replace with your actual domain)
- For GitLab.com: enter
Access Token: paste the token you just created (with
apiandread_userpermissions)
Click "Test Connection"—if it passes, click "Save" to enable.
# Future Extension Potential
MR details embedding: Directly view MR overview, changed files, and diffs within the plugin (can start simple then gradually enhance).
Approval and commenting: Support commenting, emoji reactions, change suggestions, and reading/submitting Approve/Request Changes in the plugin.
Label/Milestone management: Quickly assign labels and milestones to MRs for lightweight categorization and tracking.
Batch operations: Batch assign, label, or subscribe to MRs in the filtered results.
# 🔜 Conclusion & Upcoming Content
Through this example, you can experience the flexibility and openness of the Zadig IDP plugin system. With the SDK, you can quickly develop, easily integrate internal systems, and encapsulate collaboration capabilities, so developers can work efficiently in a unified place.
📦 The example plugin in this article is open source
Check out the GitHub repo for more: 👉 koderover/zadig-idp-plugins (opens new window)
In the next article, we will cover:
"How to Build a General-Purpose iFrame Integration Plugin in Zadig" — Creating a unified entry across systems and enabling seamless synergy between R&D and business systems.
📌 Stay tuned for the latest updates and in-depth guides in the Zadig IDP Practical Series!


