
This article is one of the "Zadig IDP Plugin Development in Practice" series.
It focuses on a common requirement when implementing an internal developer platform (IDP) in enterprises—how to seamlessly integrate existing systems into a unified platform. Taking the "General Iframe Integration Plugin" as an example, we will demonstrate how to quickly embed third-party systems using the Zadig plugin system, achieving unified access for R&D tools and eliminating frequent switching. This plugin supports advanced features such as permission control and secure sandboxing, and is suitable for integrating monitoring dashboards, documentation systems, project management, and other external systems.
We will also release plugins for monitoring alert viewers, project management panels, and other typical use cases. Stay tuned!
# Preview
Current features:
- Embed any external web page
- Complete iframe configuration options (basic settings, permission controls, security sandbox)
- Browser permission settings (fullscreen, camera, microphone, geolocation, etc.)
- Sandbox permission configuration for fine-grained security control
- Localized configuration storage to automatically remember user settings
# Preparation
This plugin took about one day to develop, but you don’t have to repeat the process! Following this tutorial, you can quickly finish within an hour and immediately experience a unified entry point.
Prerequisite knowledge:
- Understanding of JavaScript, HTML, CSS, etc. Refer to MDN Web Development (opens new window).
- Familiarity with Vue.js framework (opens new window).
- UI components: recommended Element UI (opens new window).
Version requirements:
- Node.js v20.0+
- Yarn v4.0+
- Zadig v4.0+
First, install the Zadig IDP plugin development SDK and initialize the plugin scaffold following the prompts:
# Install zadig-plugin-cli globally
yarn global add zadig-plugin-cli-dev
# Verify installation
zadig-plugin --version
zadig-plugin --help
# Create a plugin (default type: Page)
zadig-plugin create iframe-zadig
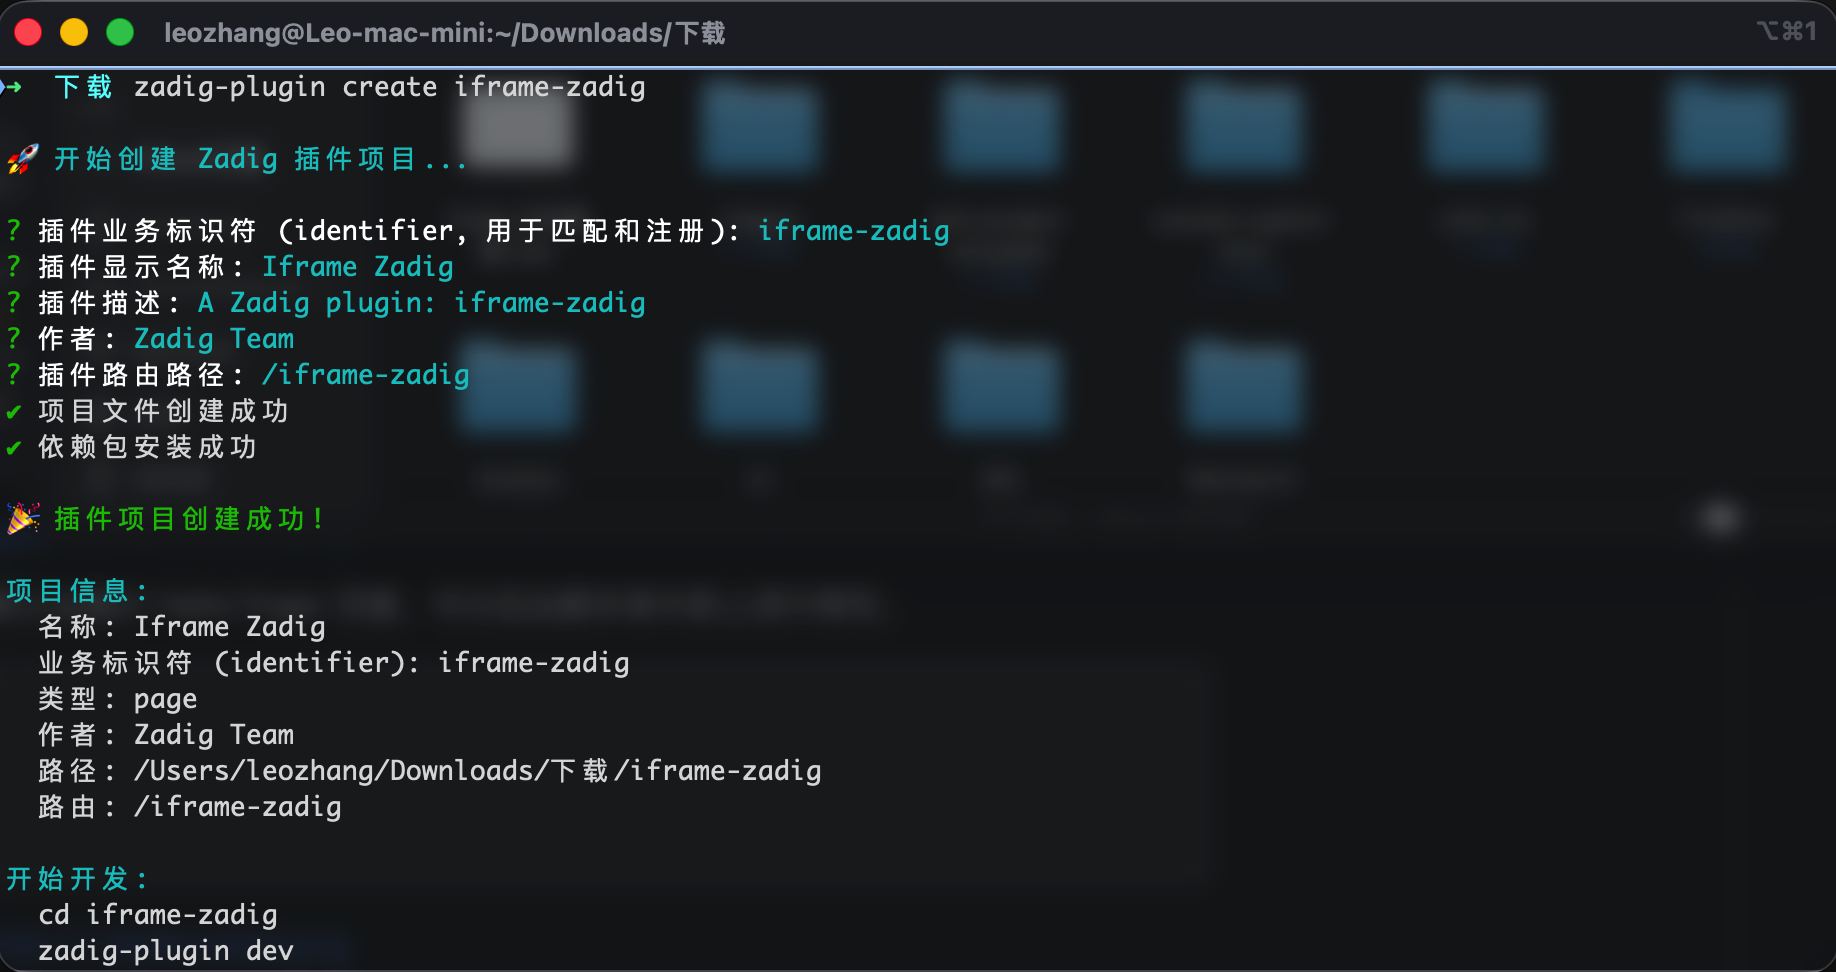
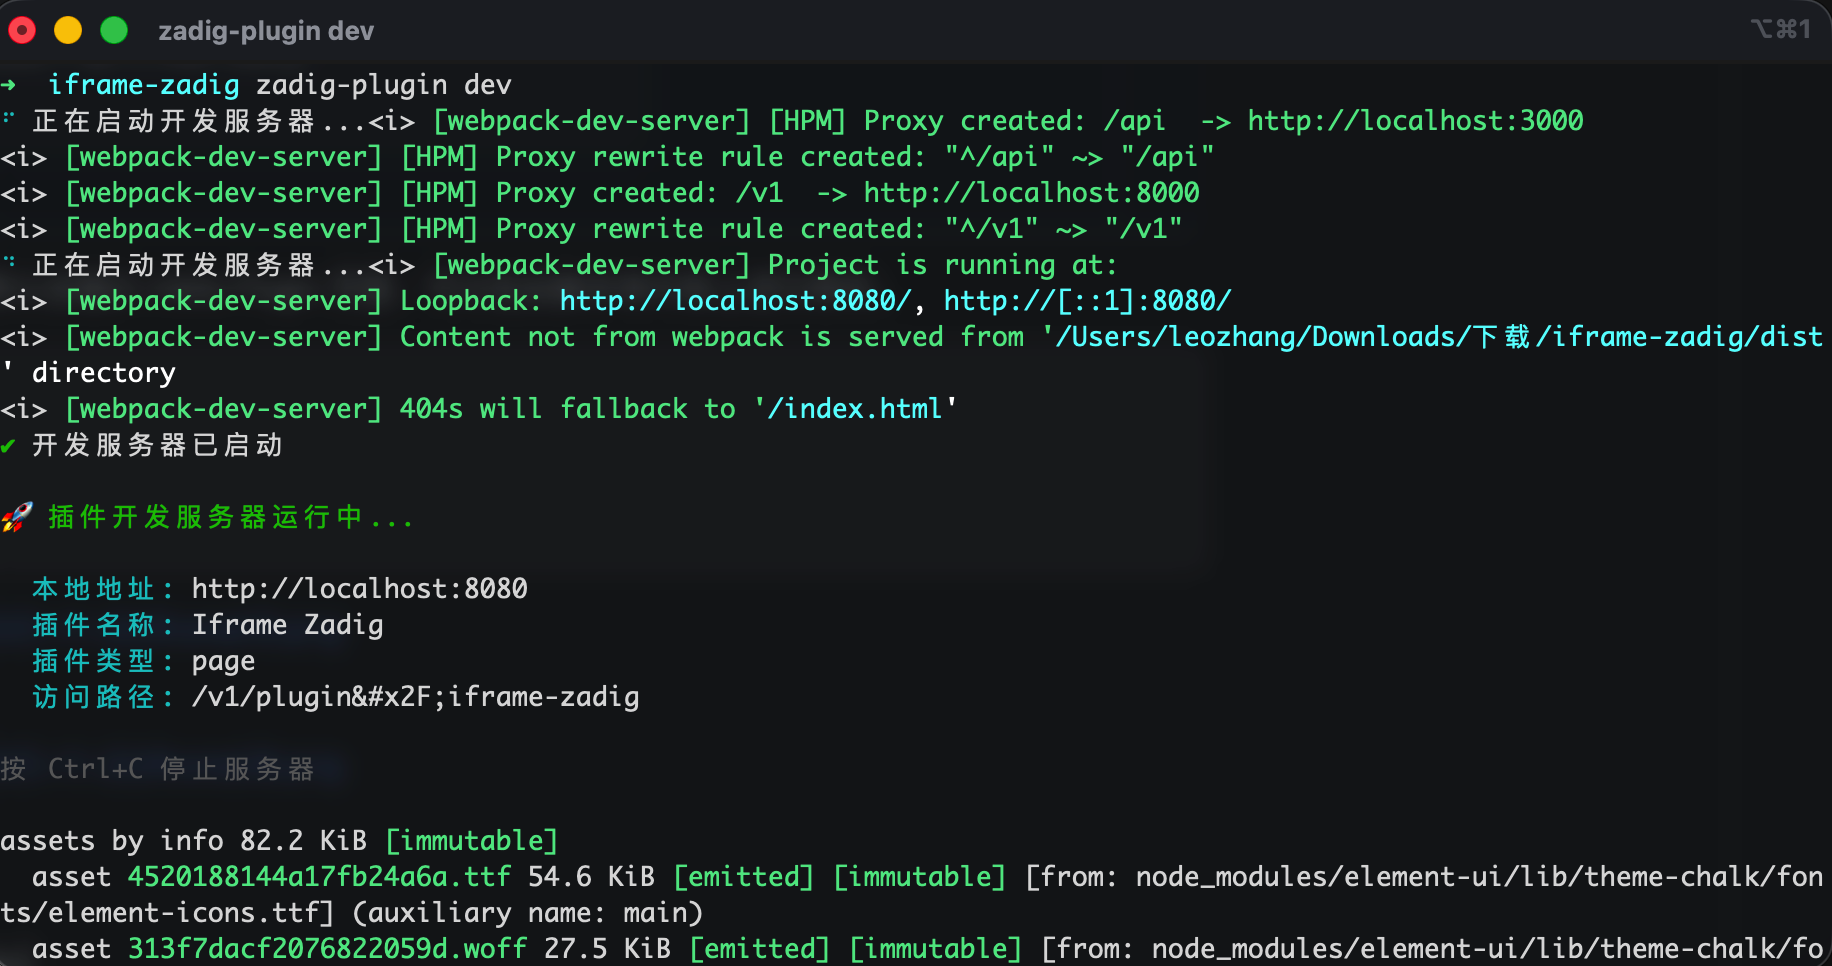
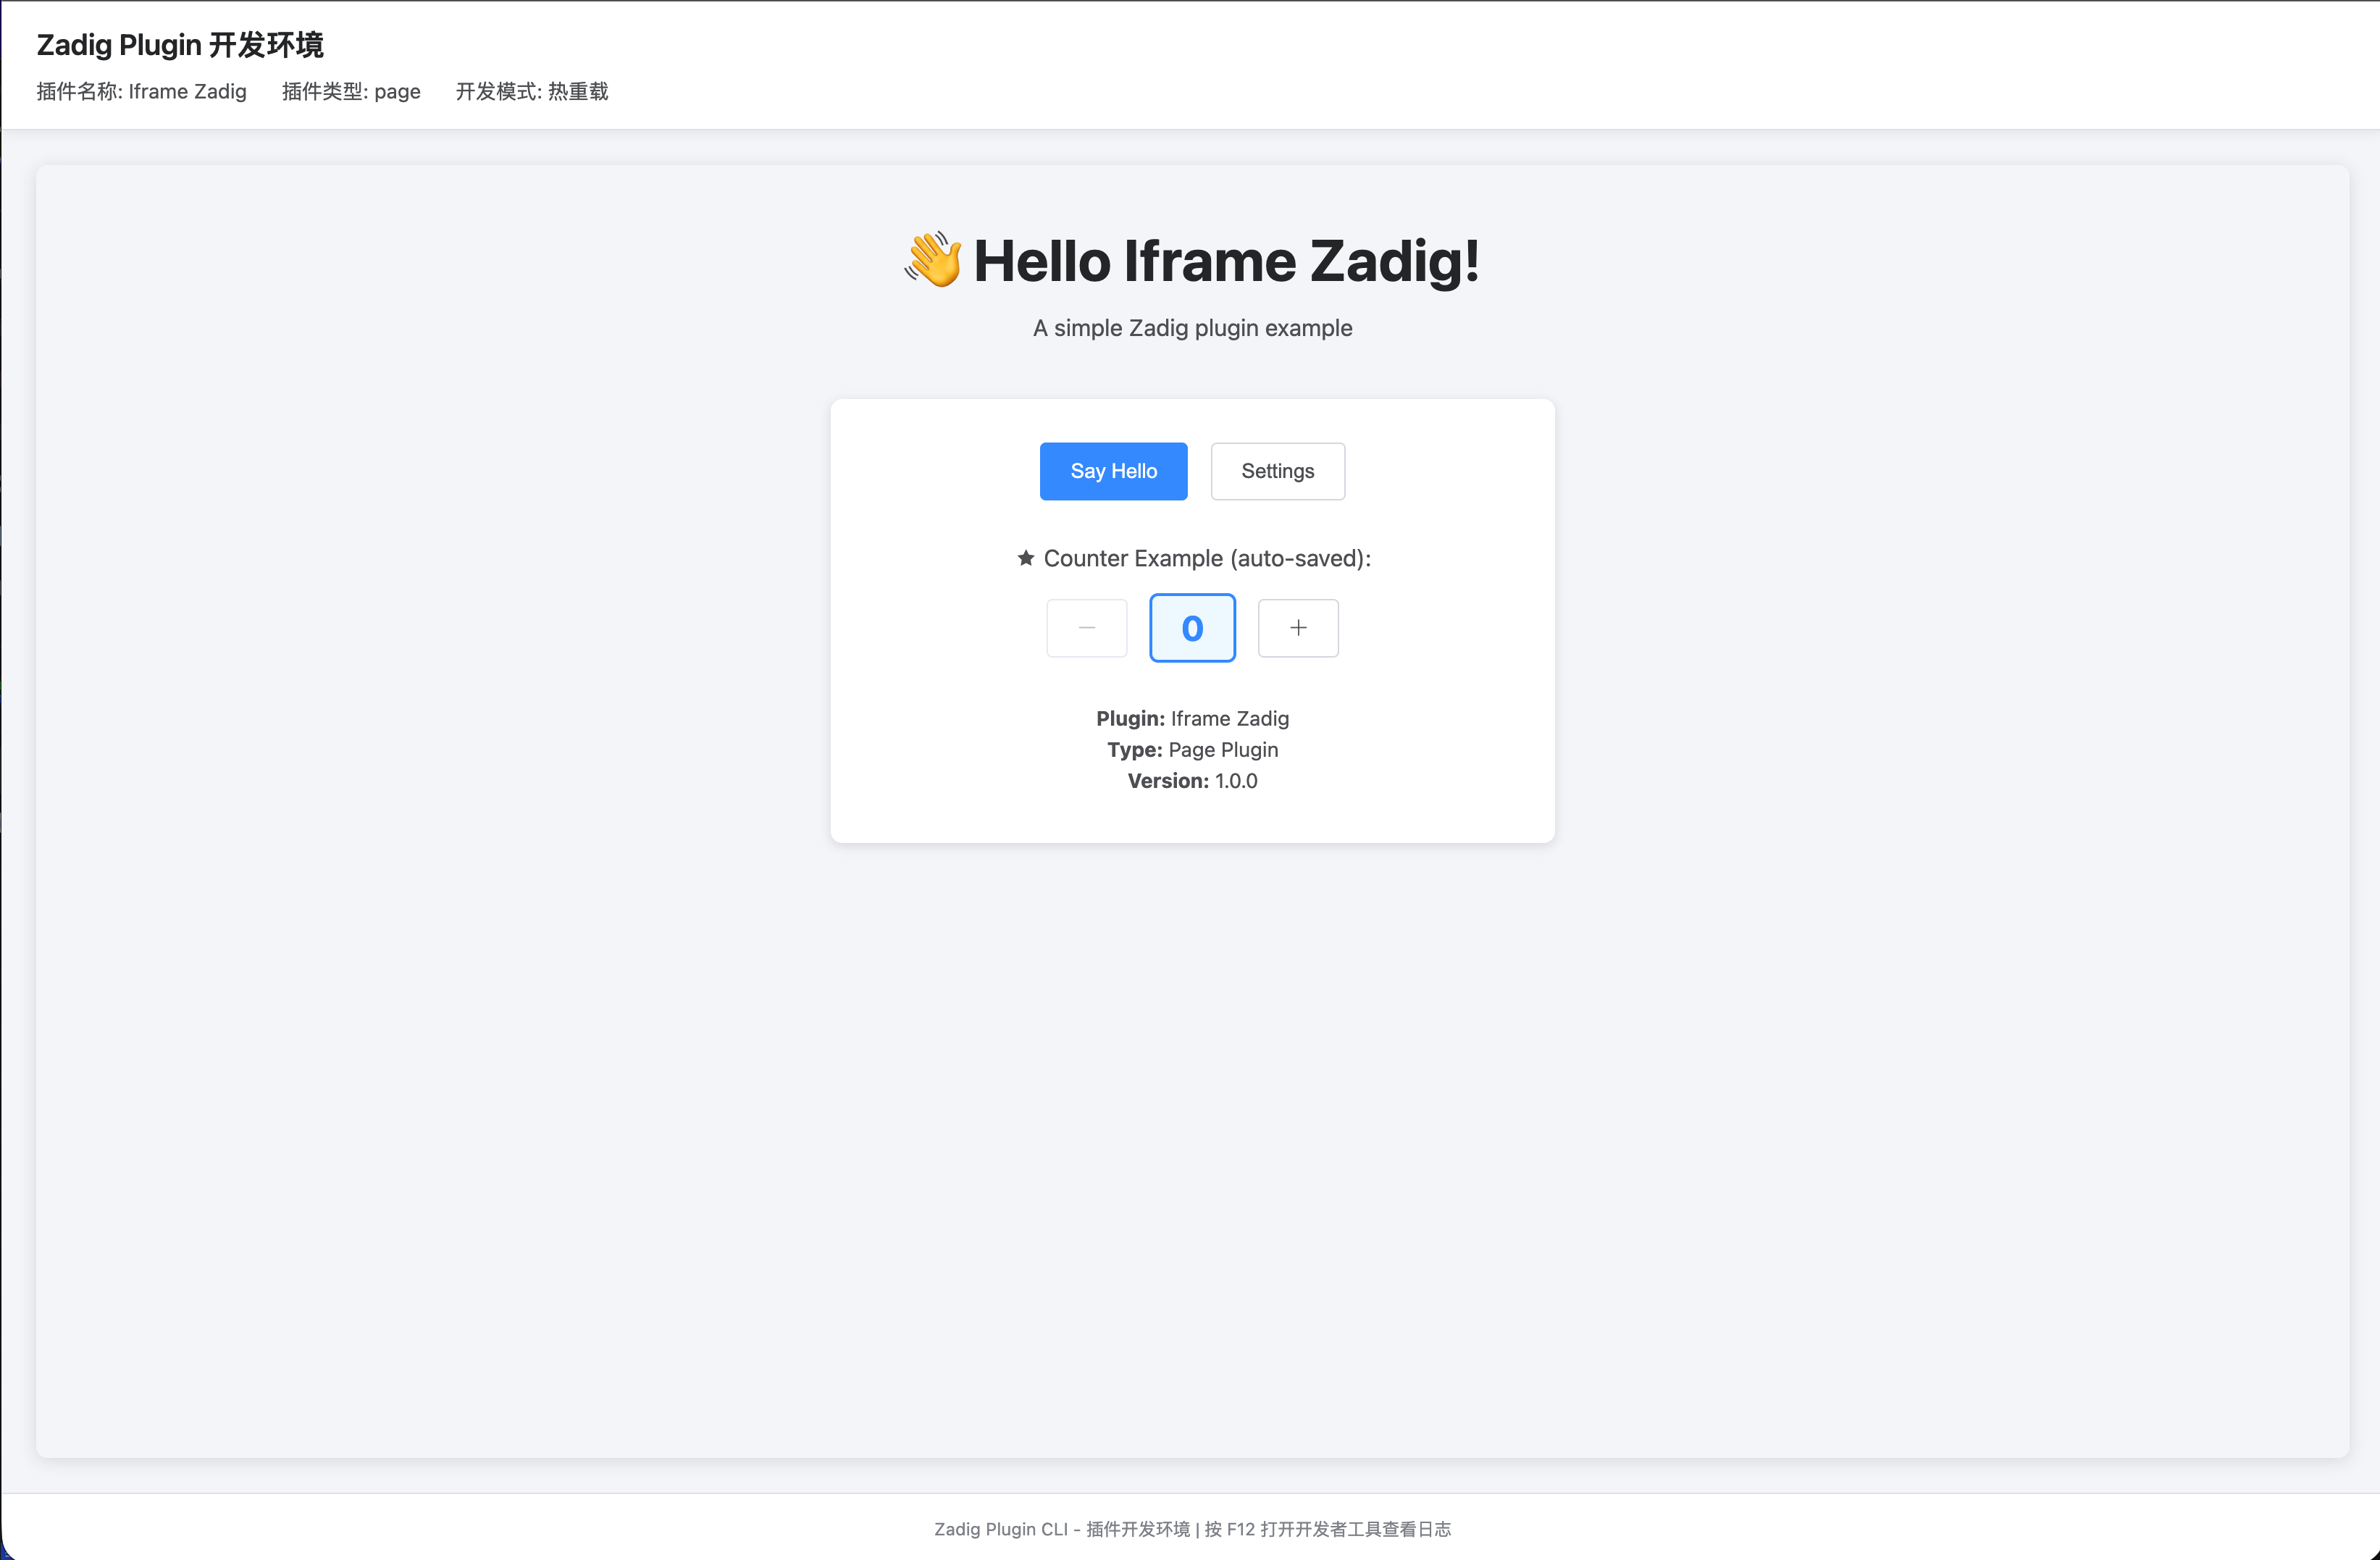
Enter the directory and start the development server. By default, you will see a Hello Plugin page, which you can modify based on the scaffold.
cd iframe-zadig
zadig-plugin dev
# Core Code Highlights
# Entry and Route Registration (index.js)
When the plugin is mounted, it registers the main route and defines manifest metadata (identifier, name, route, type, etc.). This is generated by the SDK by default and can be used as is.
// Route registration (excerpt)
this.registerRoute({
  path: "/",
  component: WrappedComponent,
  meta: {
    title: "Iframe Zadig",
  },
});

// manifest (excerpt)
const manifest = {
  identifier: "iframe-zadig",
  name: "Iframe Zadig",
  version: "1.0.0",
  description: "General Iframe Integration Plugin",
  type: "page",
  route: "/iframe-zadig",
};
# Main Page Container (components/MainPage.vue)
- Uses local storage to save iframe configurations (URL, permissions, sandbox, etc.)
- Automatically pops up the config dialog upon first visit
- Supports clicking config button to modify settings at any time
<template>
  <div class="iframe-plugin">
    <!-- Config Button -->
    <div v-if="hasConfig" class="config-button-wrapper">
      <el-button
        type="primary"
        icon="el-icon-setting"
        circle
        size="small"
        @click="openConfigDialog"
      ></el-button>
    </div>

    <!-- iframe content -->
    <iframe
      v-if="hasConfig"
      class="iframe-content"
      :src="iframeConfig.url"
      :title="iframeConfig.title"
      :name="iframeConfig.name"
      :allow="iframeConfig.permissions.join(' ')"
      :sandbox="iframeConfig.sandboxEnabled ? iframeConfig.sandboxPermissions.join(' ') : null"
      :referrerpolicy="iframeConfig.referrerpolicy"
      :loading="iframeConfig.loading"
      frameborder="0"
    ></iframe>

    <!-- Config Dialog -->
    <ConfigDialog
      :visible.sync="showConfigDialog"
      :config="iframeConfig"
      @save="handleConfigSave"
    />
  </div>
</template>
// Initialization Logic (excerpt)
initPlugin() {
  // Read iframe config from storage
  if (this.storage) {
    const savedConfig = this.storage.get('iframeConfig')
    if (savedConfig && savedConfig.url) {
      // Config exists, load it
      this.iframeConfig = savedConfig
      this.hasConfig = true
    } else {
      // No config, pop up config dialog
      this.showConfigDialog = true
    }
  }
}

// Save Config (excerpt)
handleConfigSave(newConfig) {
  this.iframeConfig = newConfig
  this.hasConfig = true
  if (this.storage) {
    this.storage.set('iframeConfig', newConfig)
  }
  this.$message.success('Config saved!')
}
# Config Dialog (components/ConfigDialog.vue)
Designed with tabs, divided into three configuration modules: Basic, Permissions, Security Sandbox
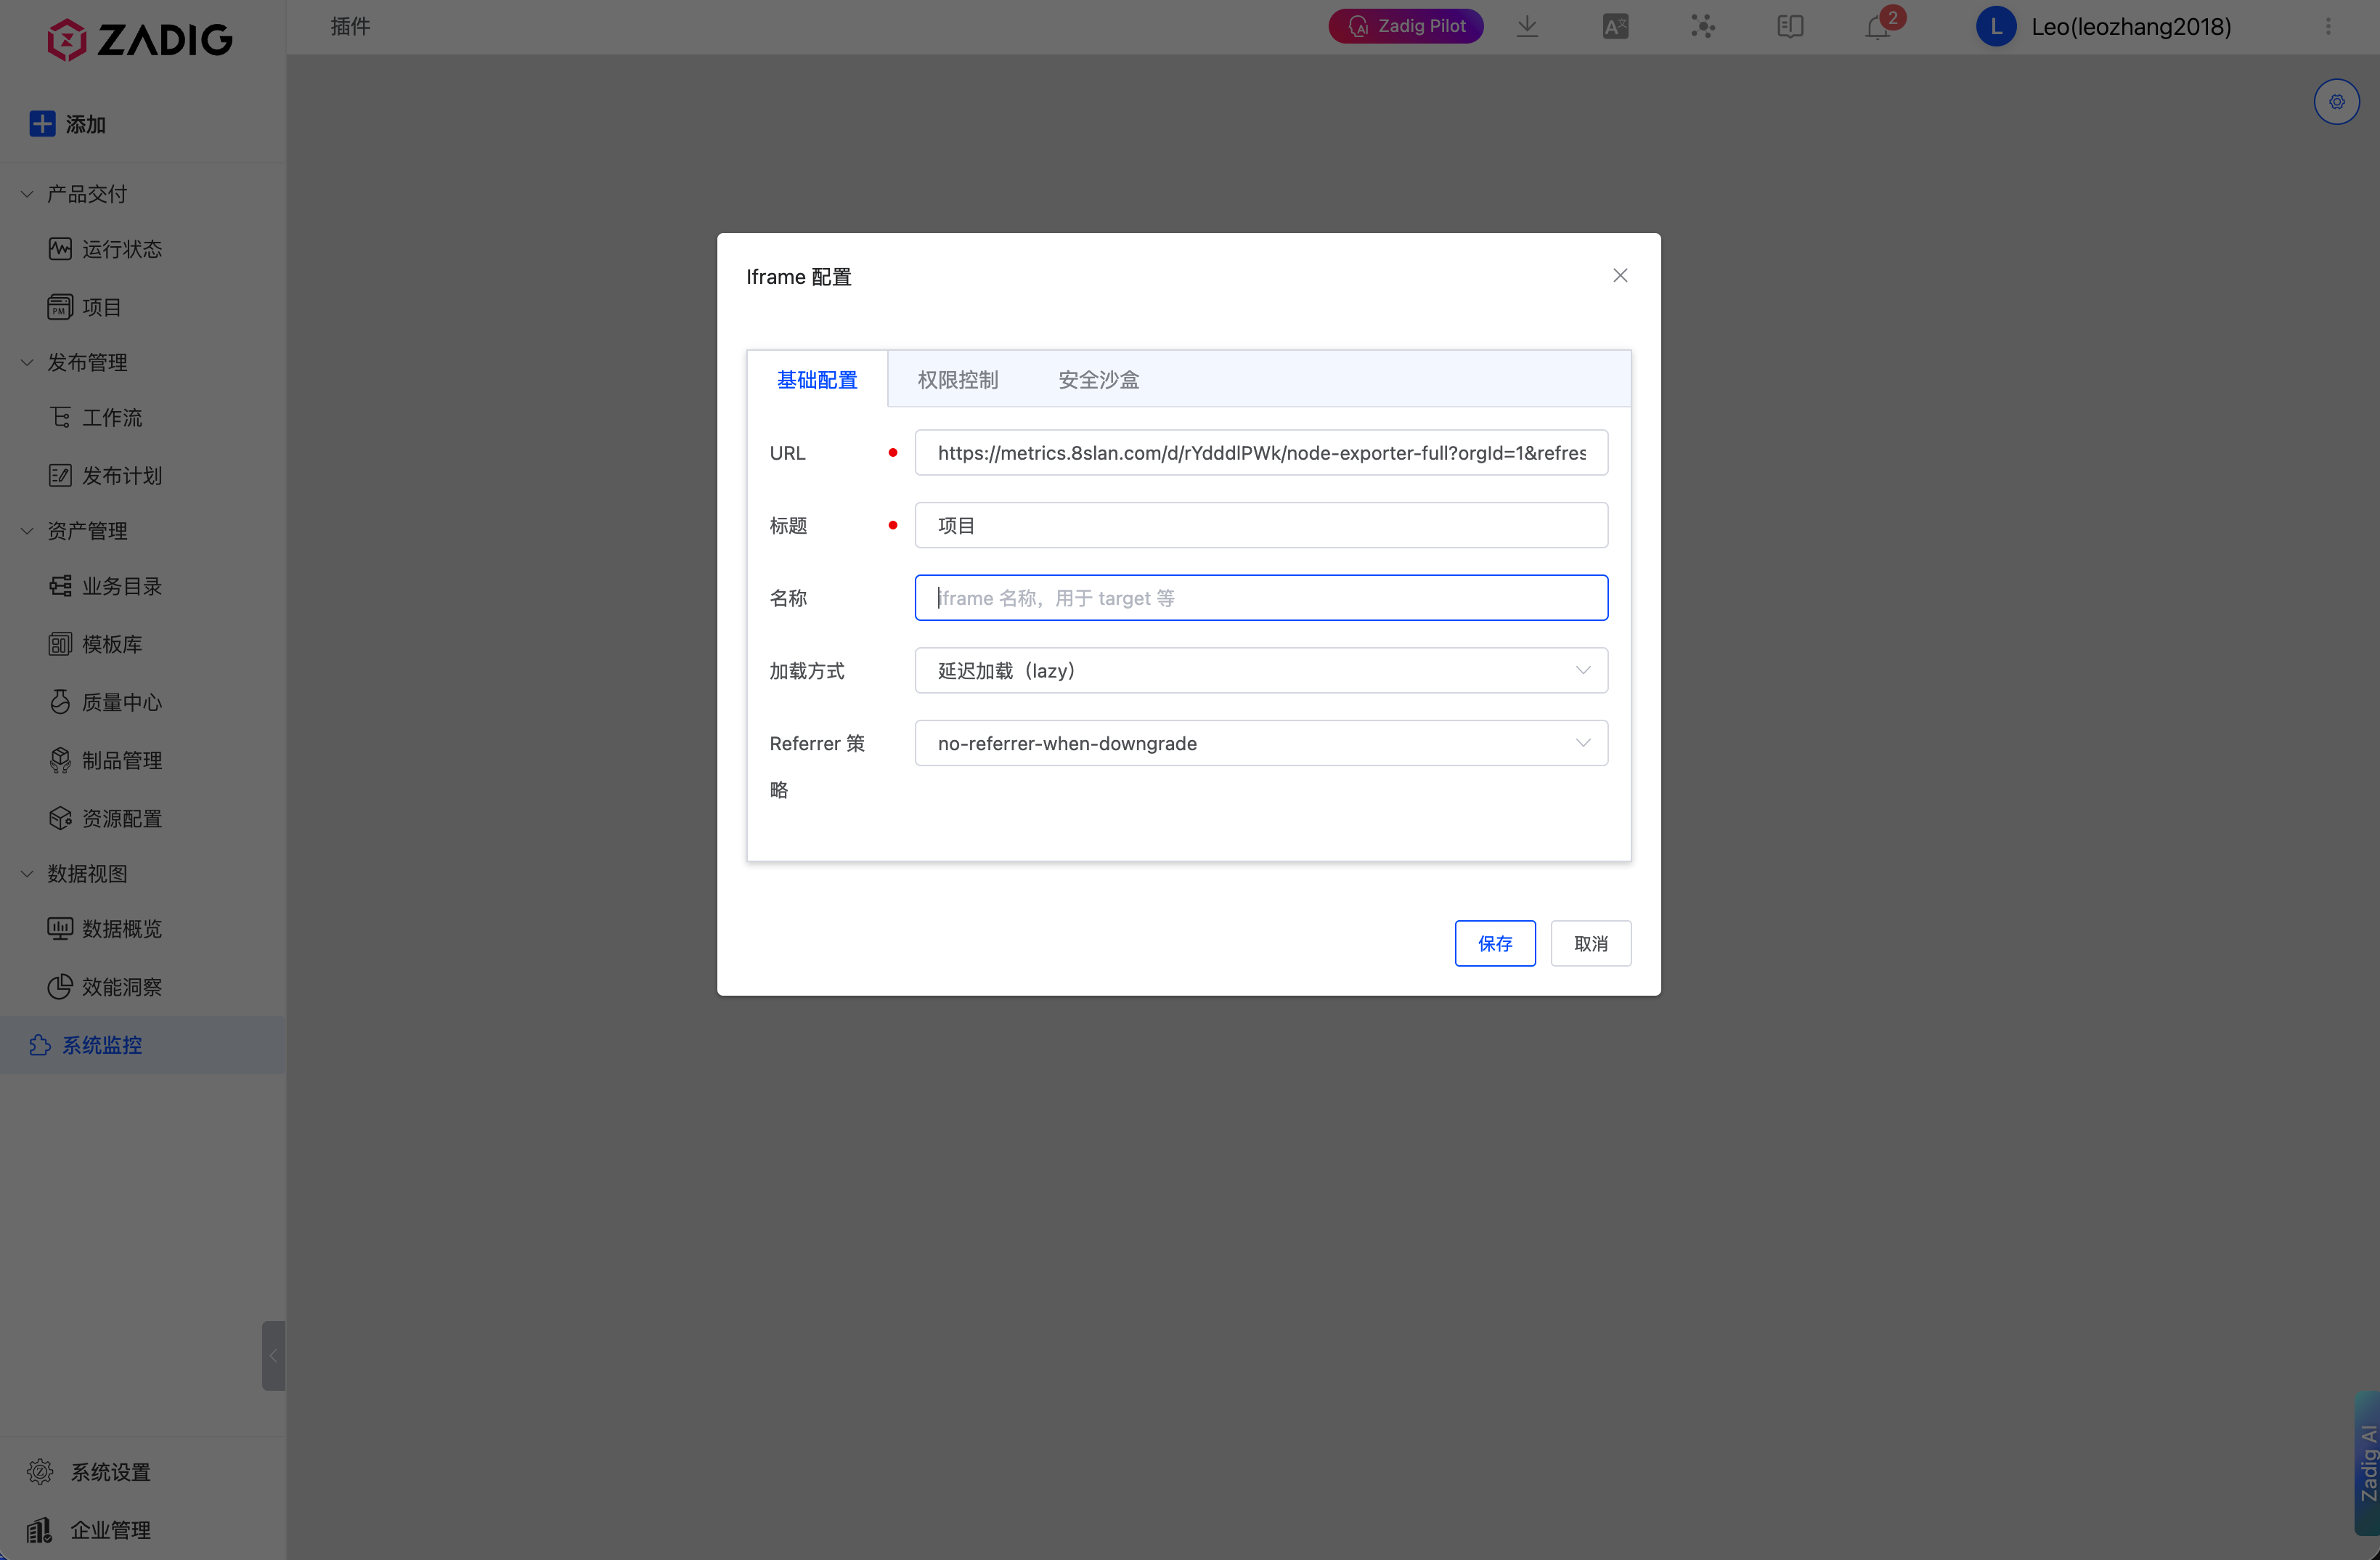
# 1. Basic Configuration Tab
<!-- Basic Configuration (excerpt) -->
<el-tab-pane label="Basic Settings" name="basic">
  <el-form :model="form" :rules="rules" ref="configForm">
    <el-form-item label="URL" prop="url">
      <el-input
        v-model="form.url"
        placeholder="Enter iframe address, e.g.: https://example.com"
      />
    </el-form-item>

    <el-form-item label="Title" prop="title">
      <el-input v-model="form.title" placeholder="Enter title" />
    </el-form-item>

    <el-form-item label="Loading Strategy">
      <el-select v-model="form.loading">
        <el-option label="Eager" value="eager"></el-option>
        <el-option label="Lazy" value="lazy"></el-option>
      </el-select>
    </el-form-item>

    <el-form-item label="Referrer Policy">
      <el-select v-model="form.referrerpolicy">
        <el-option
          label="no-referrer"
          value="no-referrer"
        ></el-option>
        <el-option
          label="no-referrer-when-downgrade"
          value="no-referrer-when-downgrade"
        ></el-option>
        <el-option label="origin" value="origin"></el-option>
        <el-option label="same-origin" value="same-origin"></el-option>
      </el-select>
    </el-form-item>
  </el-form>
</el-tab-pane>
# 2. Permissions Tab Use the allow attribute to control browser features the iframe can access
<!-- Permissions (excerpt) -->
<el-tab-pane label="Permissions" name="permissions">
  <el-form :model="form">
    <el-form-item label="Permission List">
      <el-checkbox-group v-model="form.permissions">
        <el-checkbox label="fullscreen">Fullscreen</el-checkbox>
        <el-checkbox label="autoplay">Autoplay</el-checkbox>
        <el-checkbox label="camera">Camera</el-checkbox>
        <el-checkbox label="microphone">Microphone</el-checkbox>
        <el-checkbox label="geolocation">Geolocation</el-checkbox>
        <el-checkbox label="clipboard-read">Clipboard Read</el-checkbox>
        <el-checkbox label="clipboard-write">Clipboard Write</el-checkbox>
        <el-checkbox label="payment">Payment</el-checkbox>
        <el-checkbox label="usb">USB</el-checkbox>
        <!-- More permissions... -->
      </el-checkbox-group>
    </el-form-item>
  </el-form>
</el-tab-pane>
# 3. Security Sandbox Tab
When enabled, the iframe starts with minimal permissions and requires explicit authorization.
<!-- Security Sandbox (excerpt) -->
<el-tab-pane label="Security Sandbox" name="sandbox">
  <el-form :model="form">
    <el-form-item label="Enable Sandbox">
      <el-switch v-model="form.sandboxEnabled"></el-switch>
    </el-form-item>

    <el-form-item label="Sandbox Permissions" v-if="form.sandboxEnabled">
      <el-checkbox-group v-model="form.sandboxPermissions">
        <el-checkbox label="allow-scripts">Allow Scripts</el-checkbox>
        <el-checkbox label="allow-same-origin">Allow Same Origin</el-checkbox>
        <el-checkbox label="allow-forms">Allow Forms</el-checkbox>
        <el-checkbox label="allow-popups">Allow Popups</el-checkbox>
        <el-checkbox label="allow-modals">Allow Modals</el-checkbox>
        <el-checkbox label="allow-downloads">Allow Downloads</el-checkbox>
        <!-- More sandbox permissions... -->
      </el-checkbox-group>
    </el-form-item>
  </el-form>
</el-tab-pane>
# Build & Test
Use zadig-plugin dev for real-time preview and hot reload.
Debugging suggestions:
- Open browser developer tools and check Console and Network
- If the page fails to display, check if the target site has set
X-Frame-Optionsto forbid embedding - If sandbox is enabled, make sure to check both
allow-scriptsandallow-same-origin
After local debugging, you can build for production:
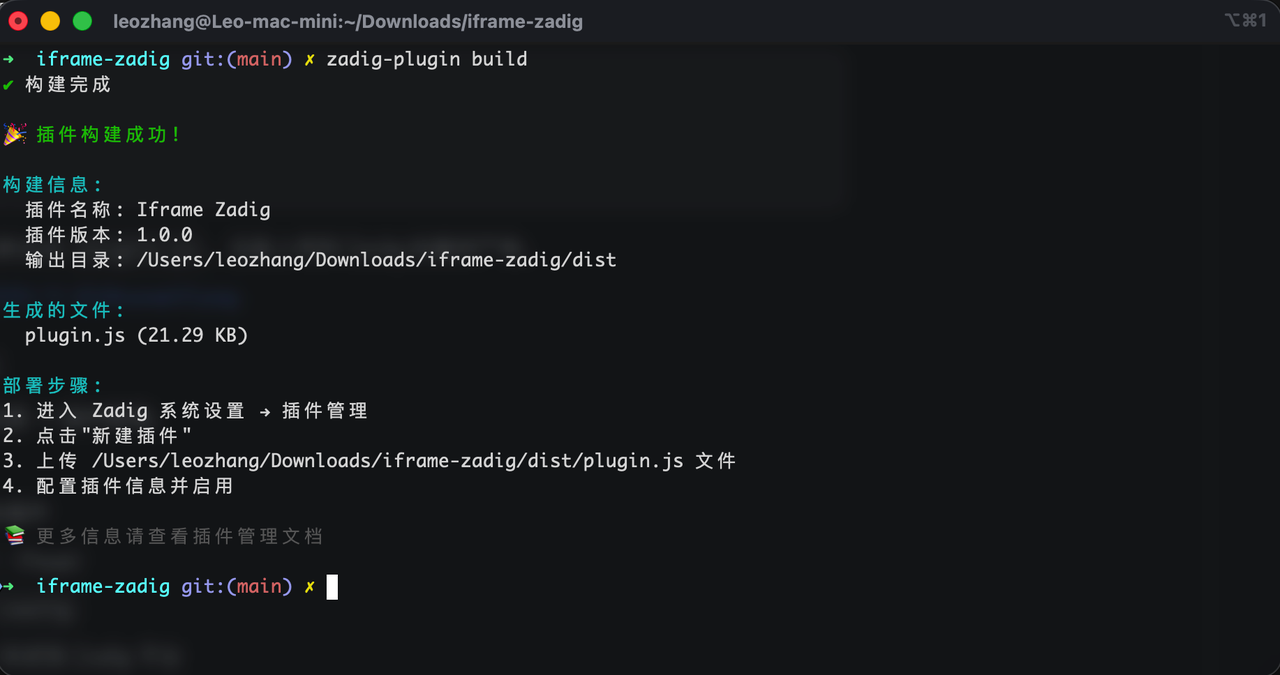
# Build for production
zadig-plugin build
When building finishes, plugin.js will be generated in the dist/ directory—this is the final artifact to upload to Zadig.
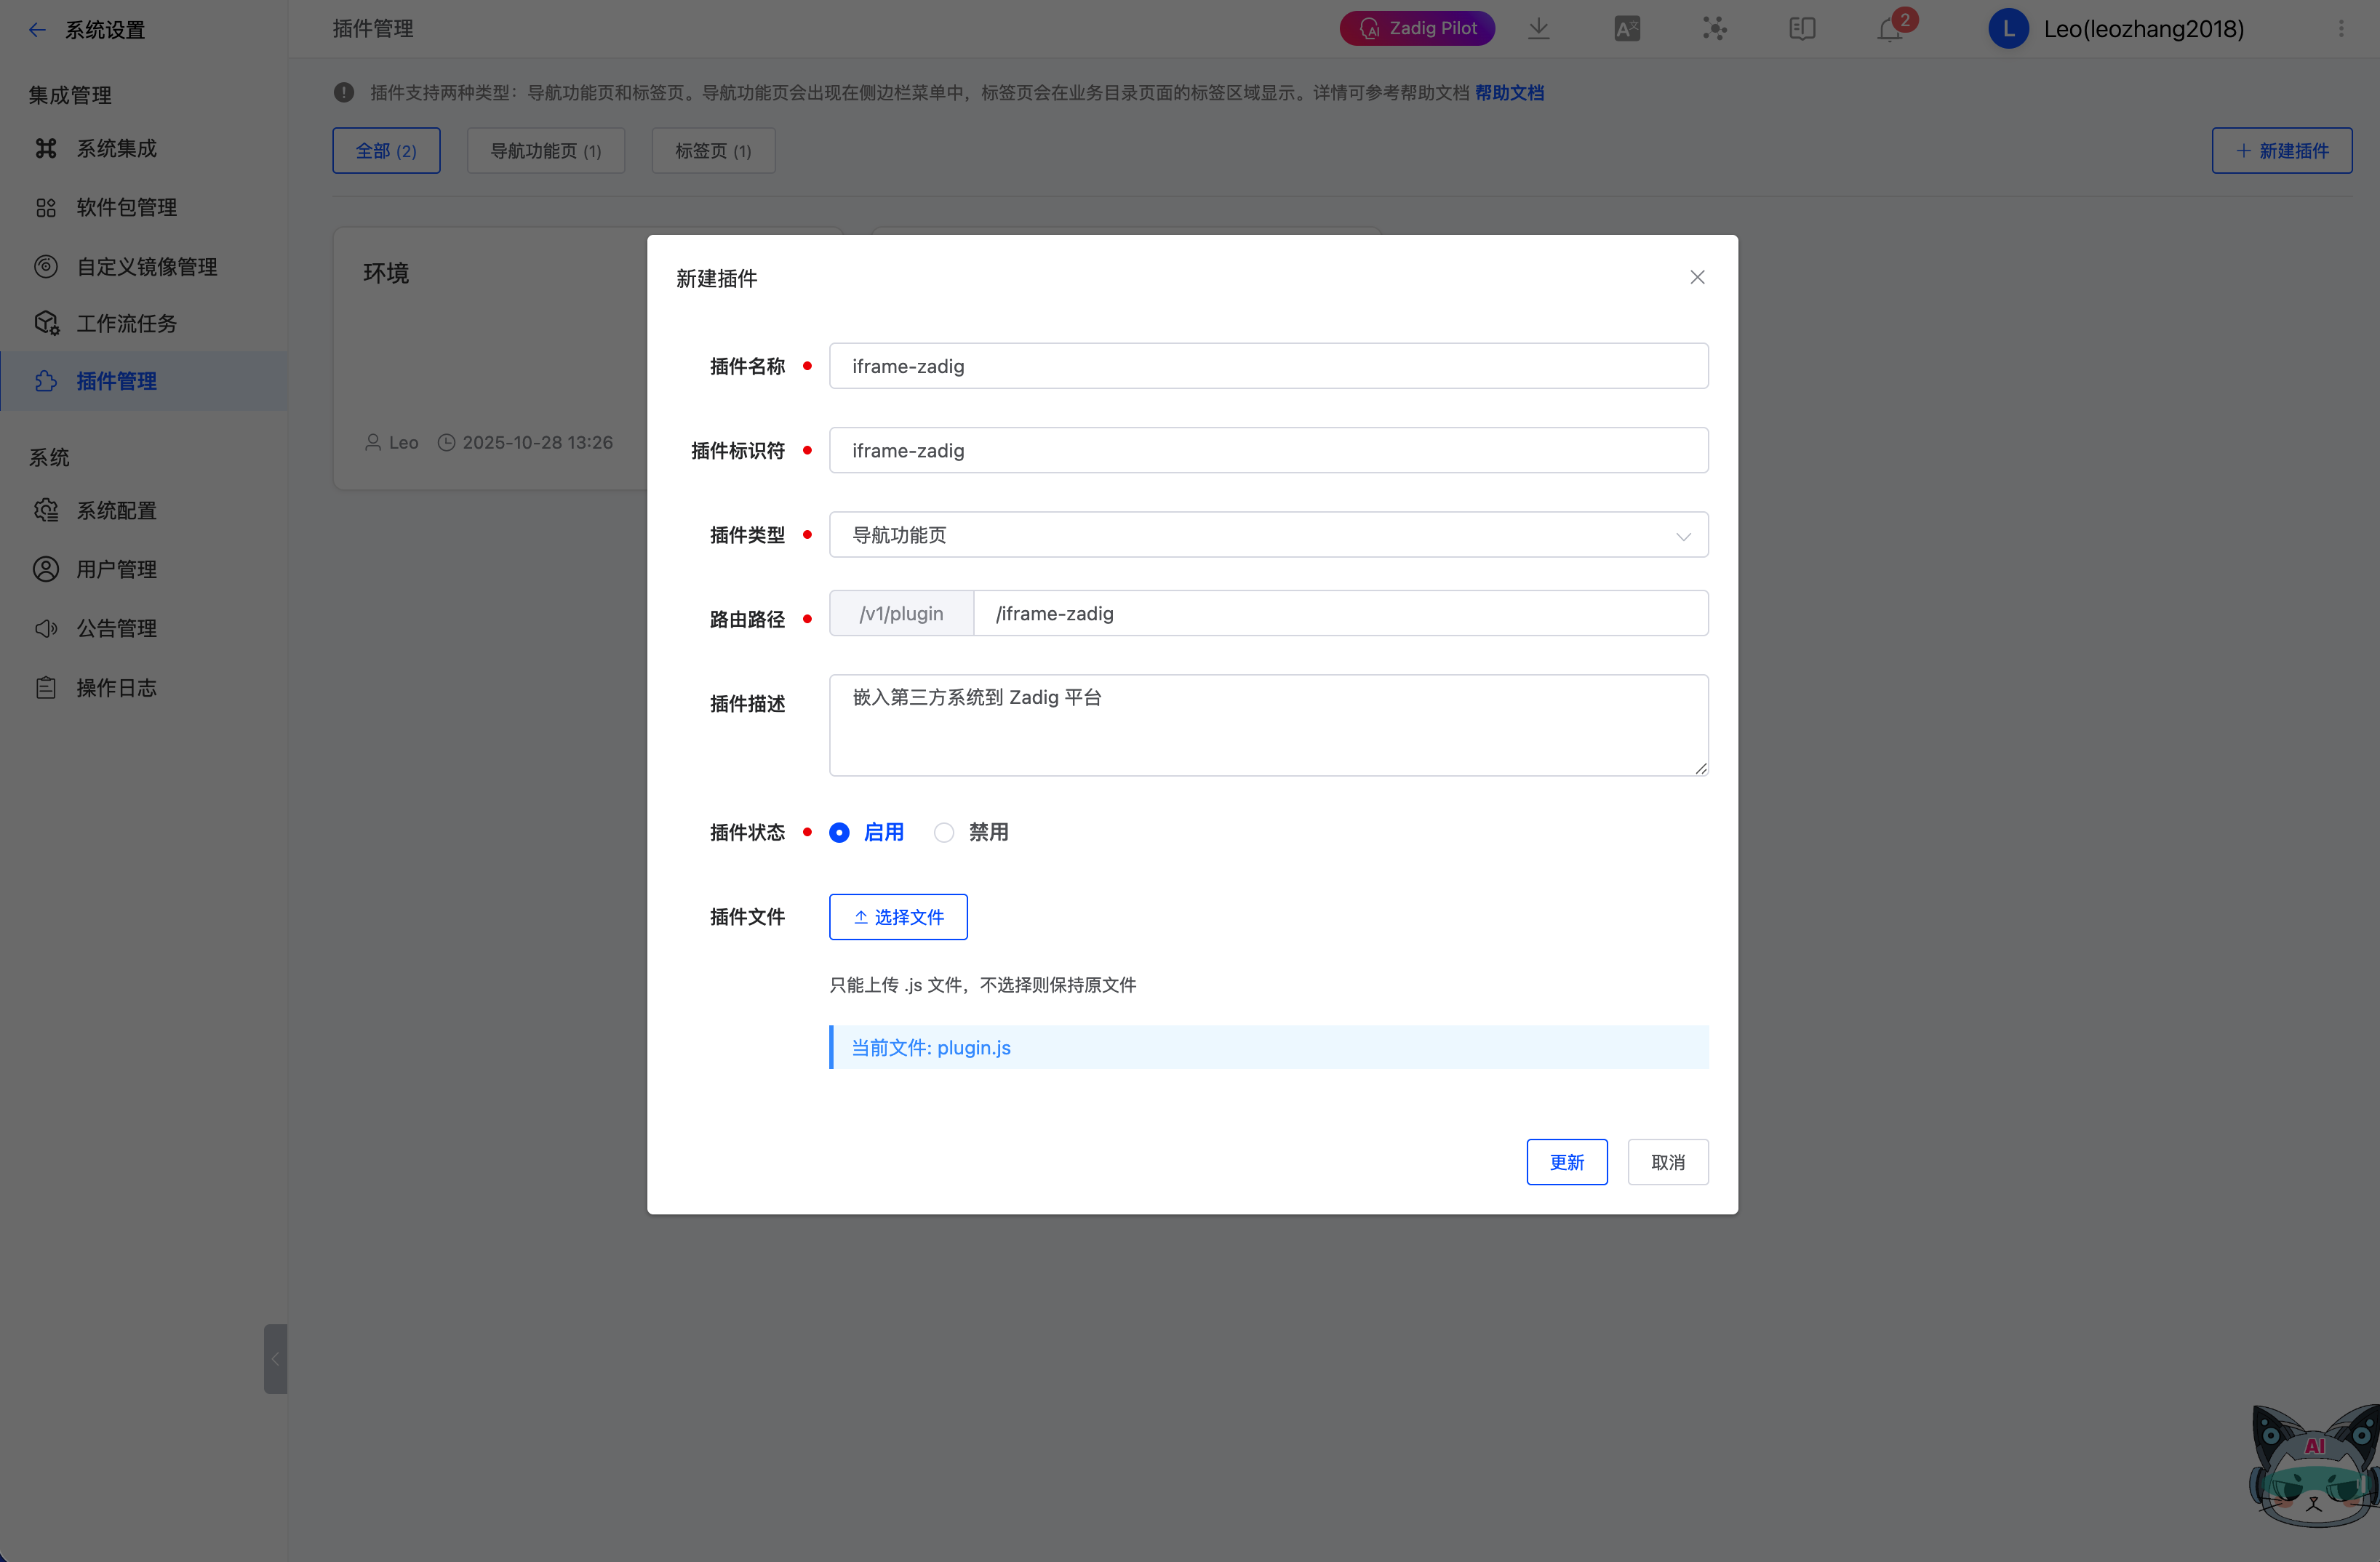
# Uploading and Publishing in Zadig
Log in to Zadig → Go to "System Settings → Plugin Management"
Click "New Plugin", and fill in:
- Plugin Name: Iframe Integration Plugin
- Plugin Type: Page
- Route Path:
/iframe-zadig - Plugin Description: Embed third-party systems into the Zadig platform
- Plugin Status: Enabled
- Upload build artifact:
dist/plugin.js
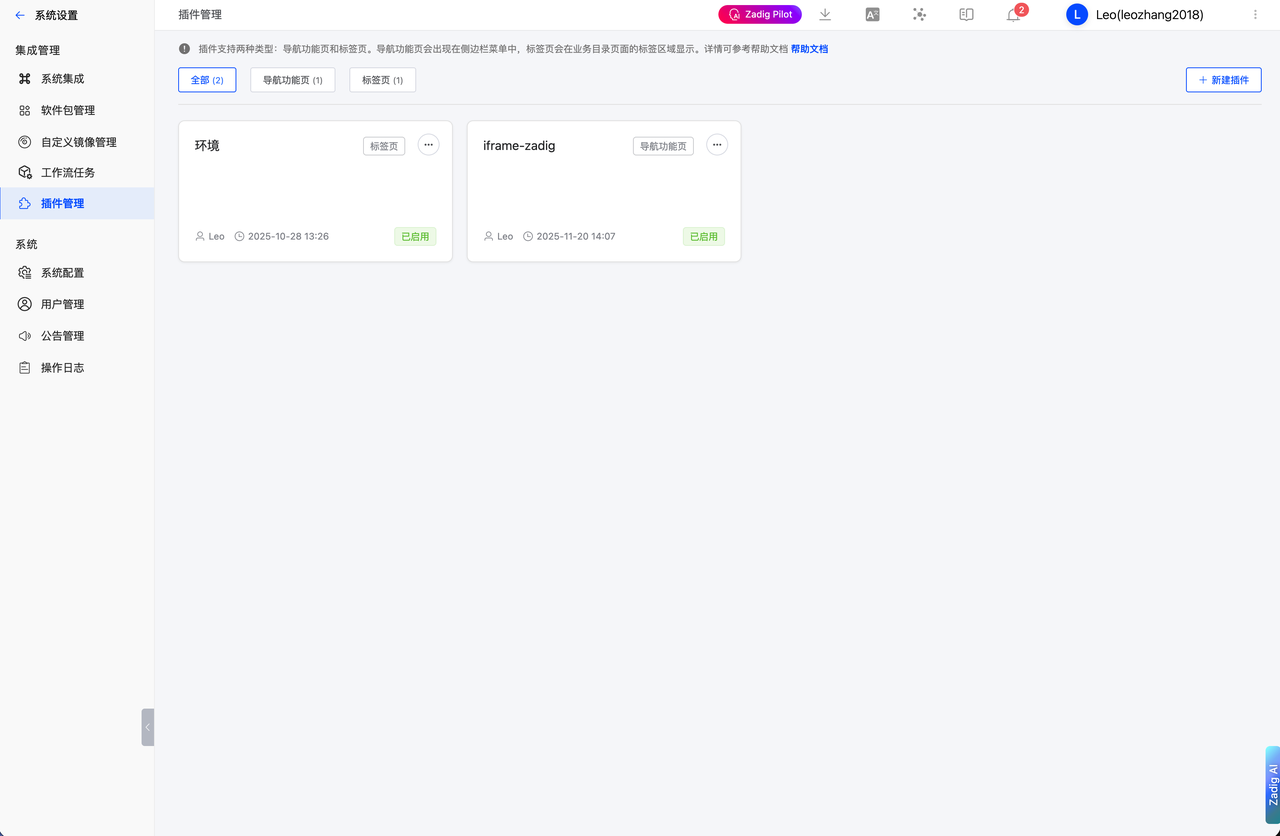
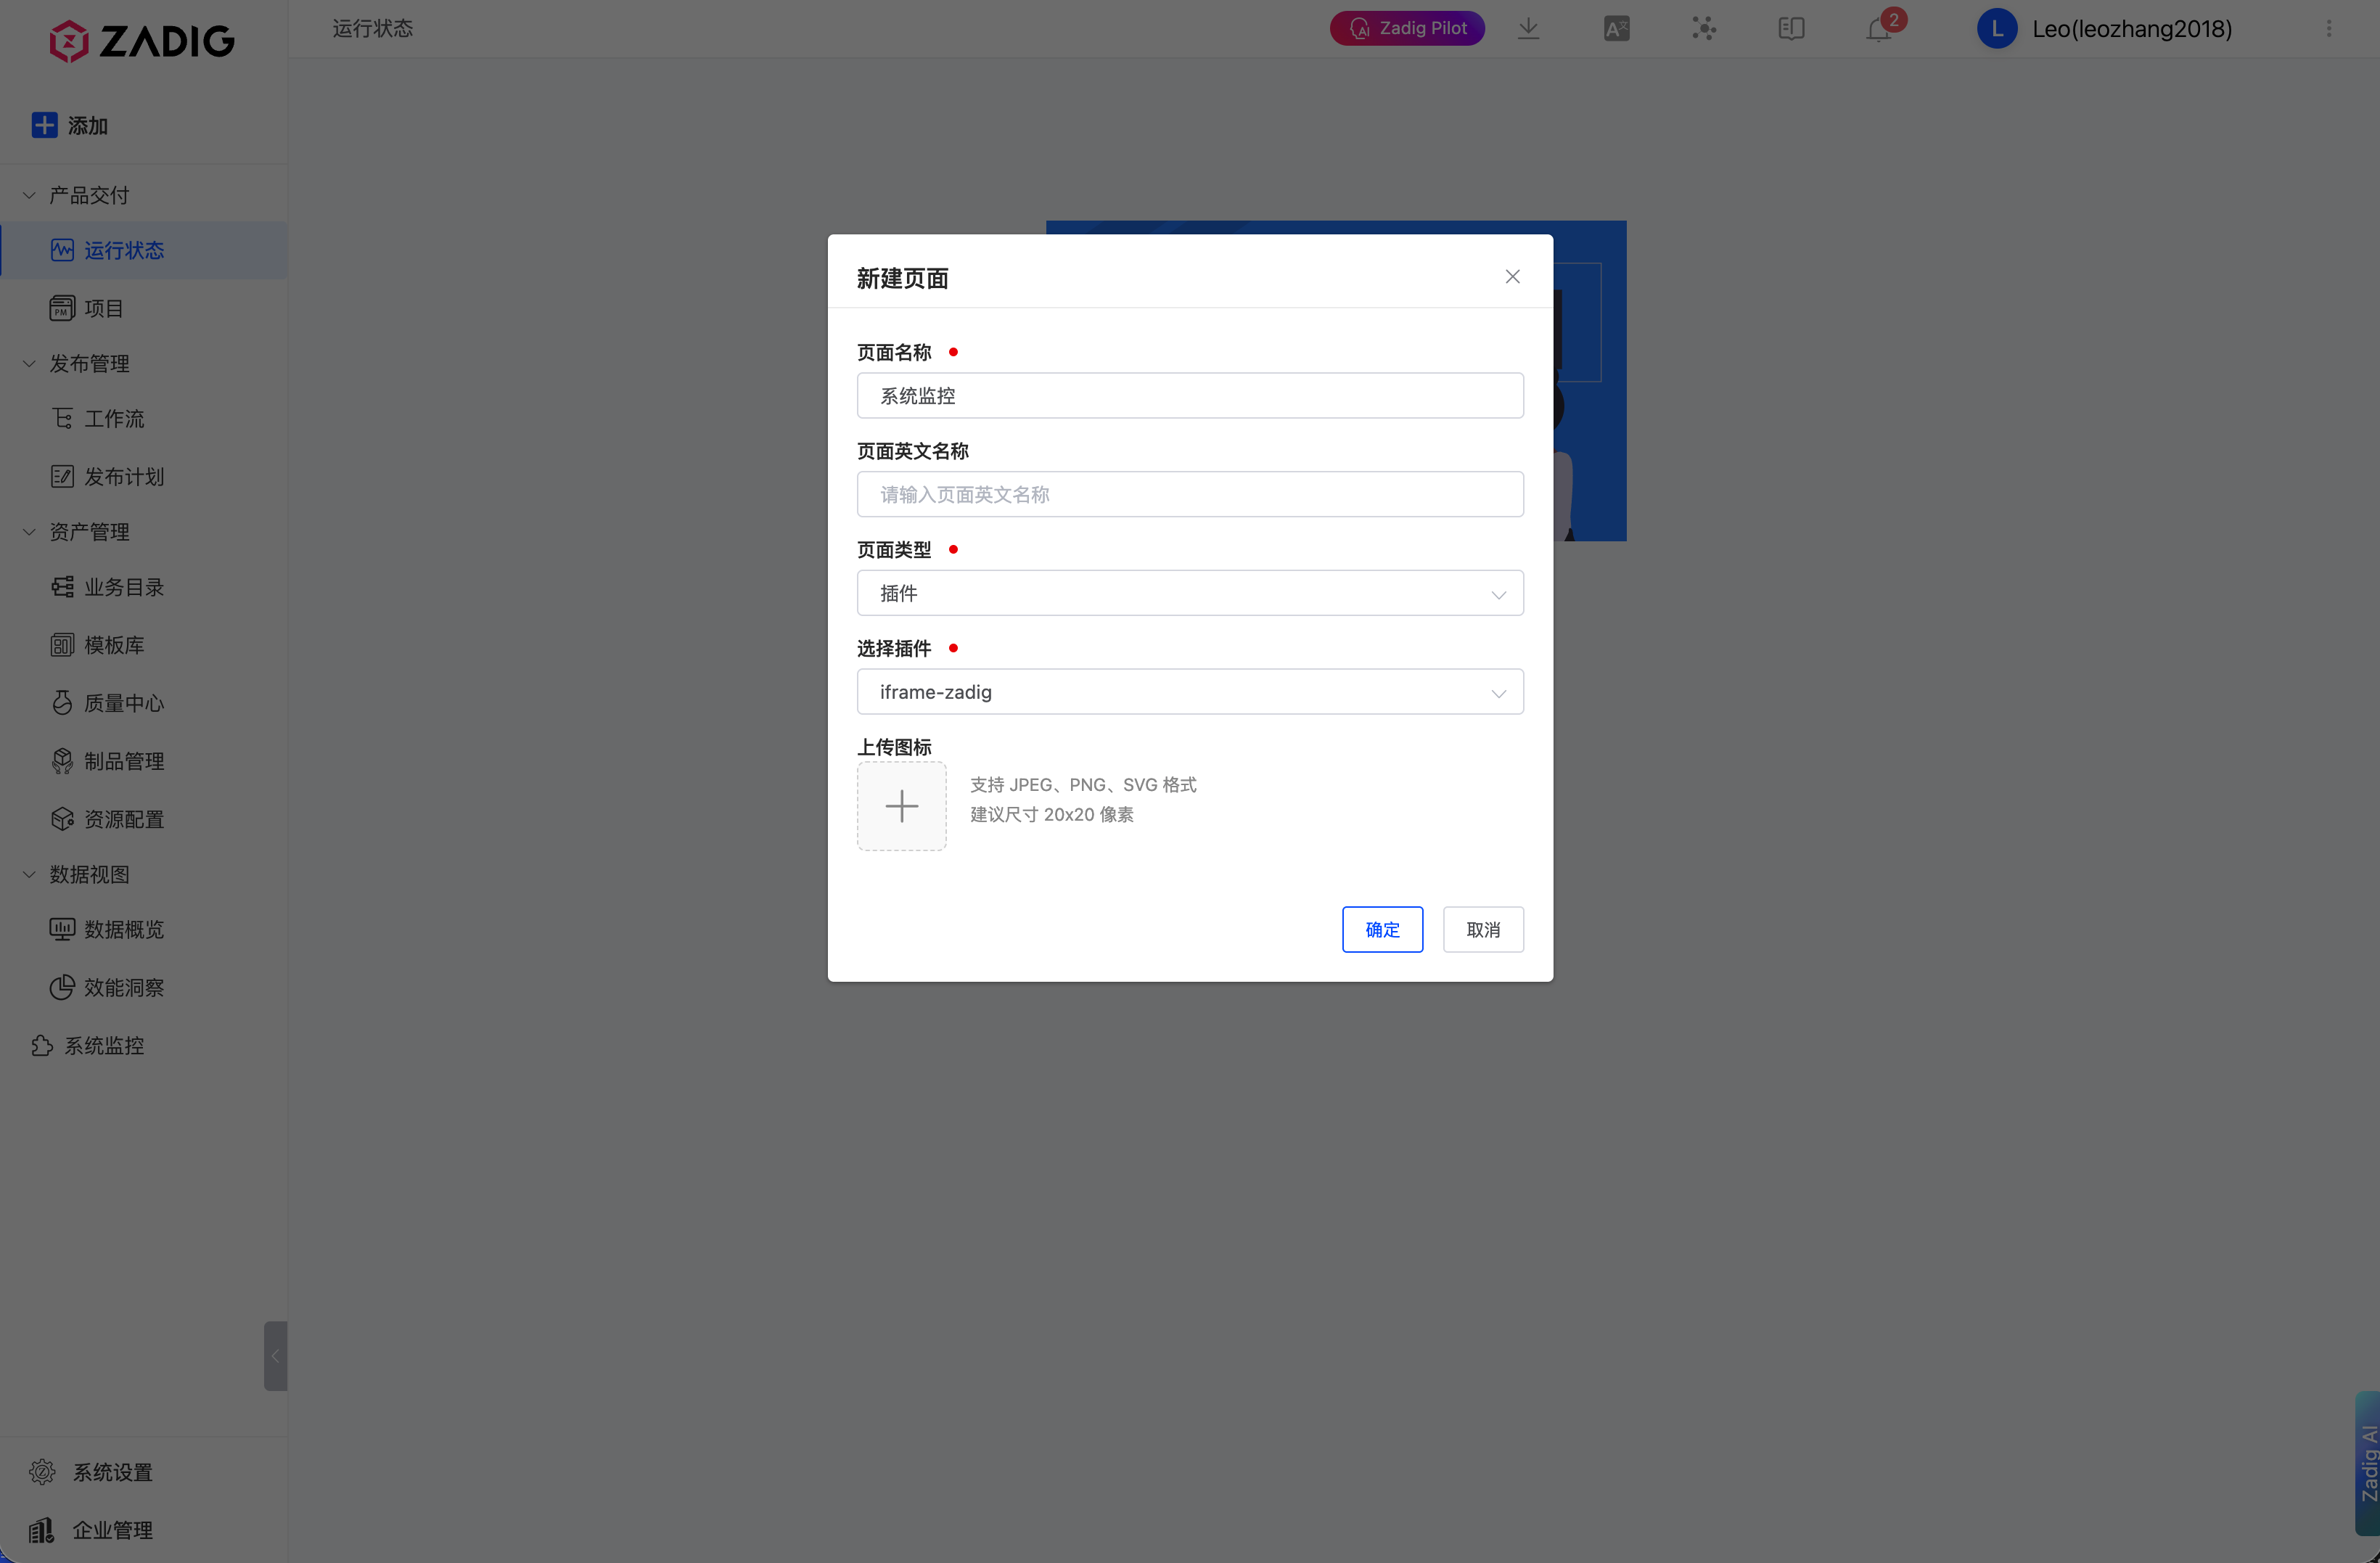
Go back to the main sidebar, click add page, select plugin type, then select the newly created plugin
# Demo: Configurations and Use Cases
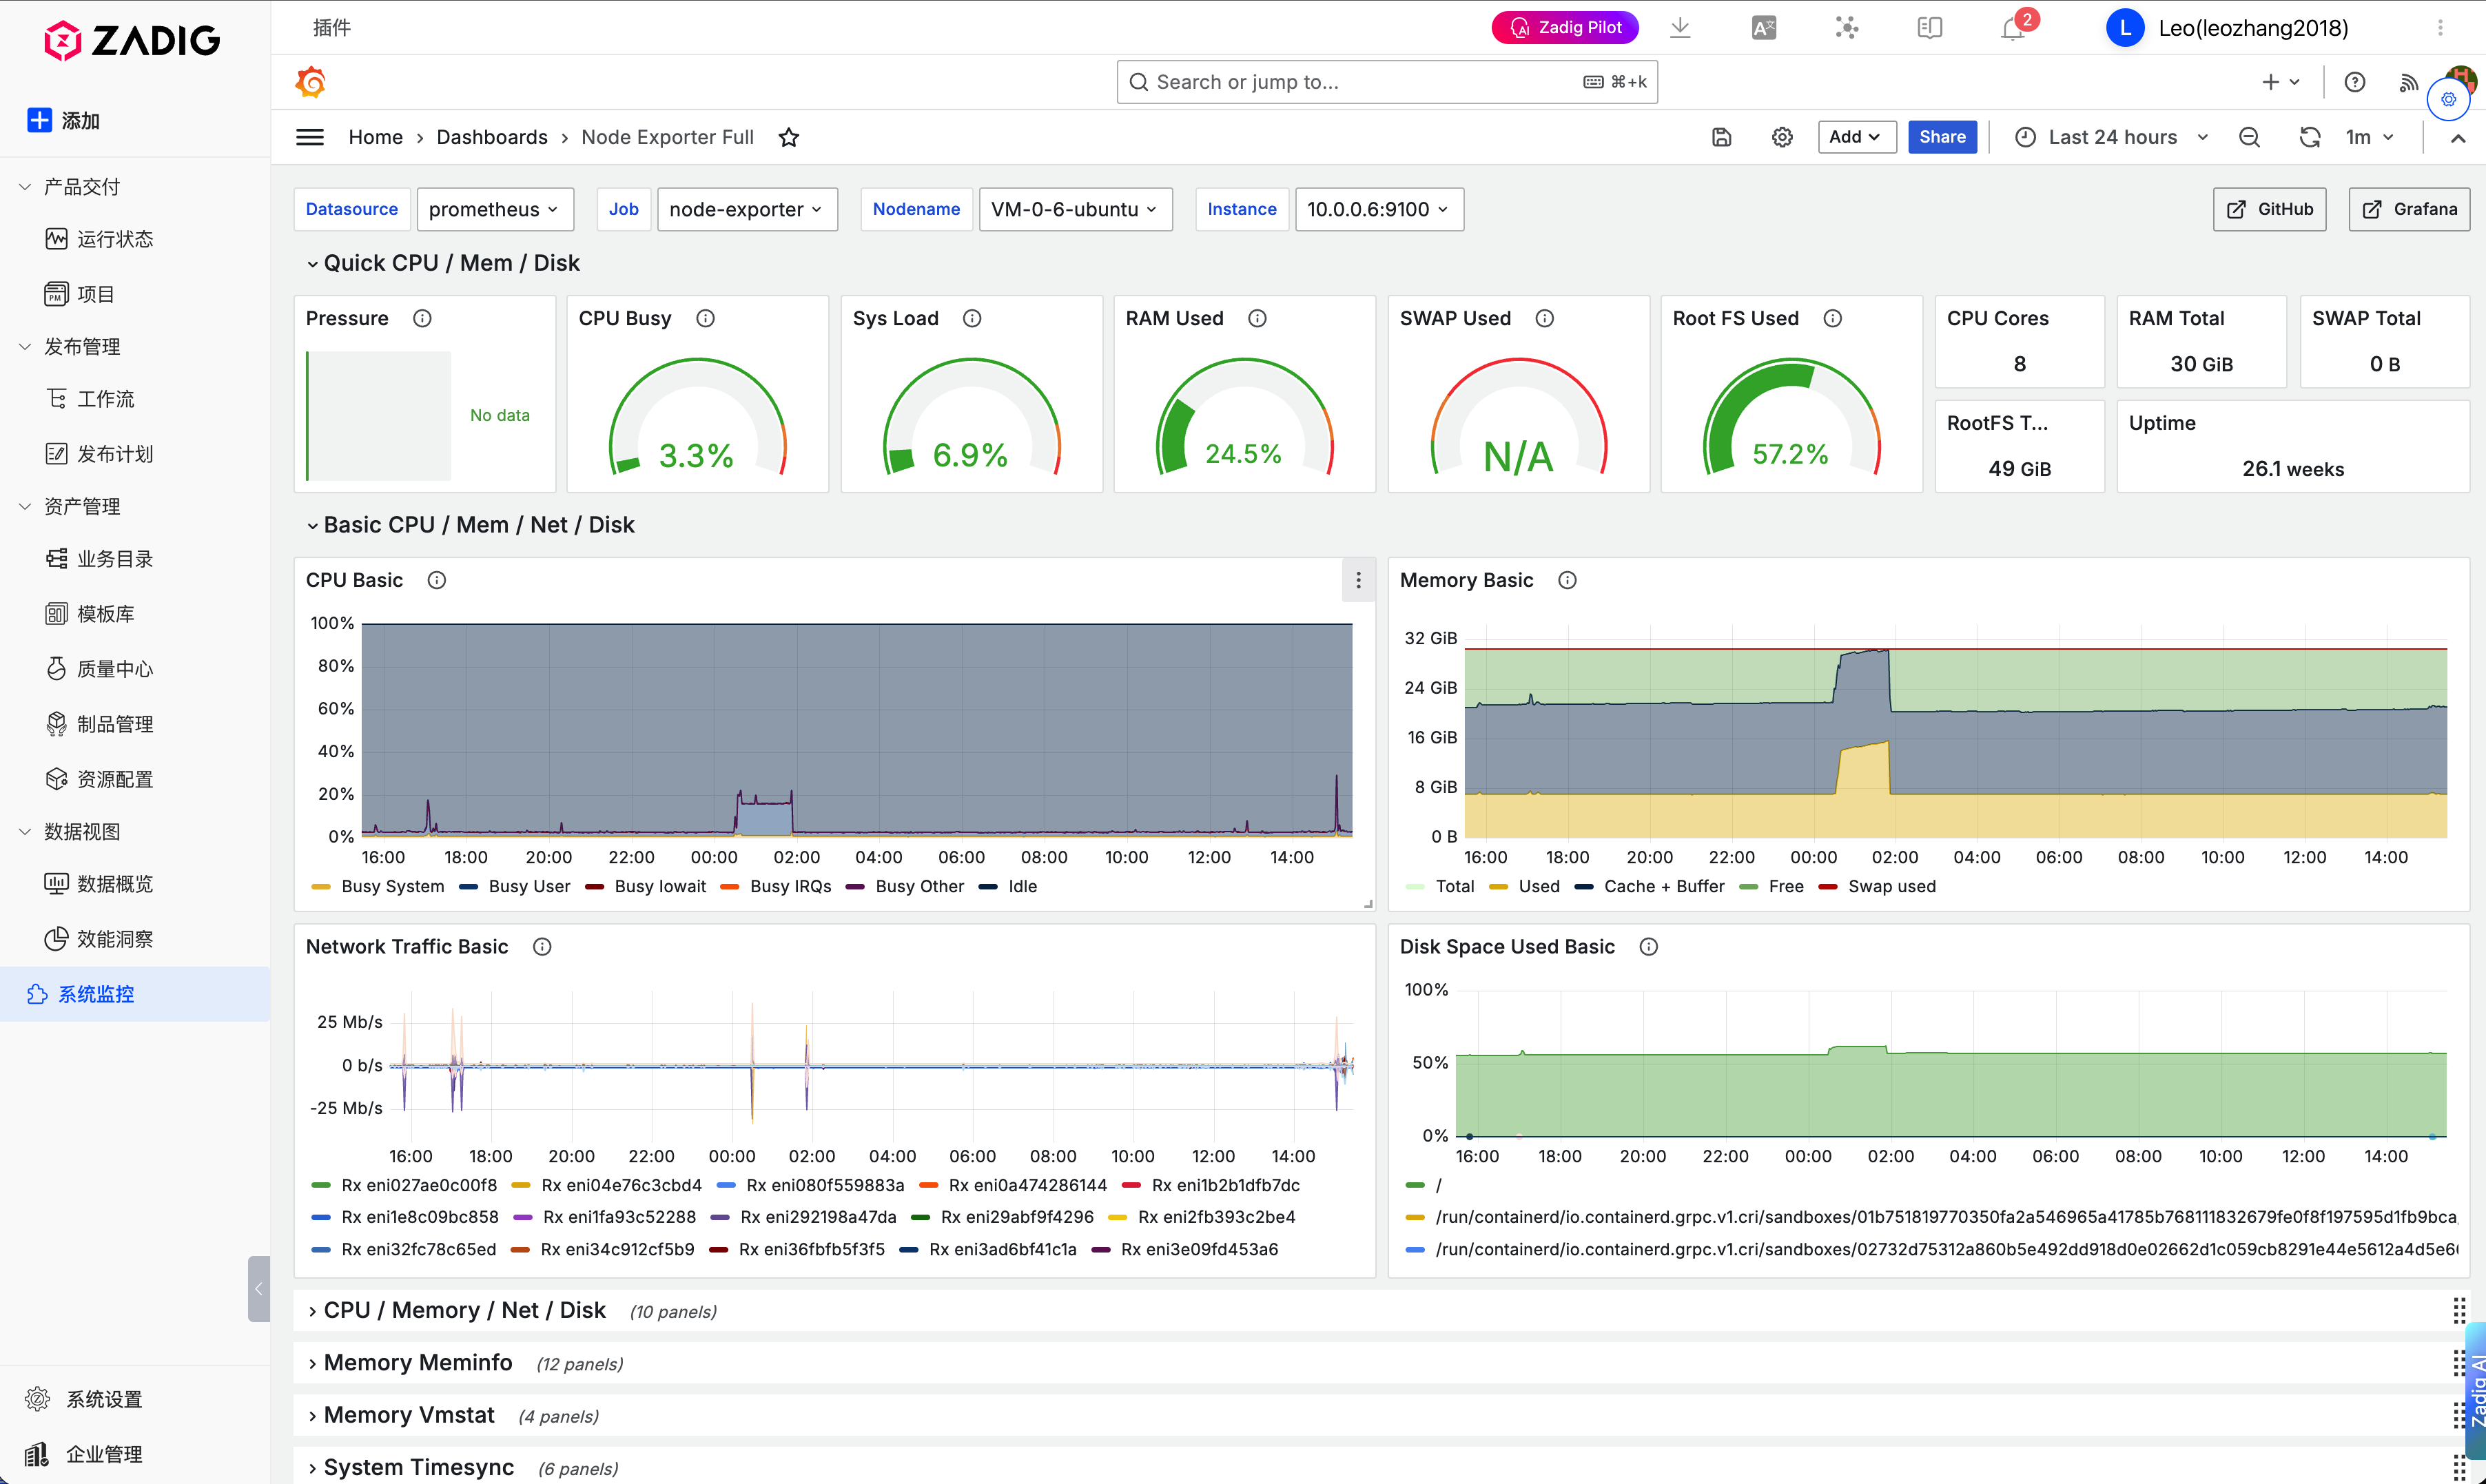
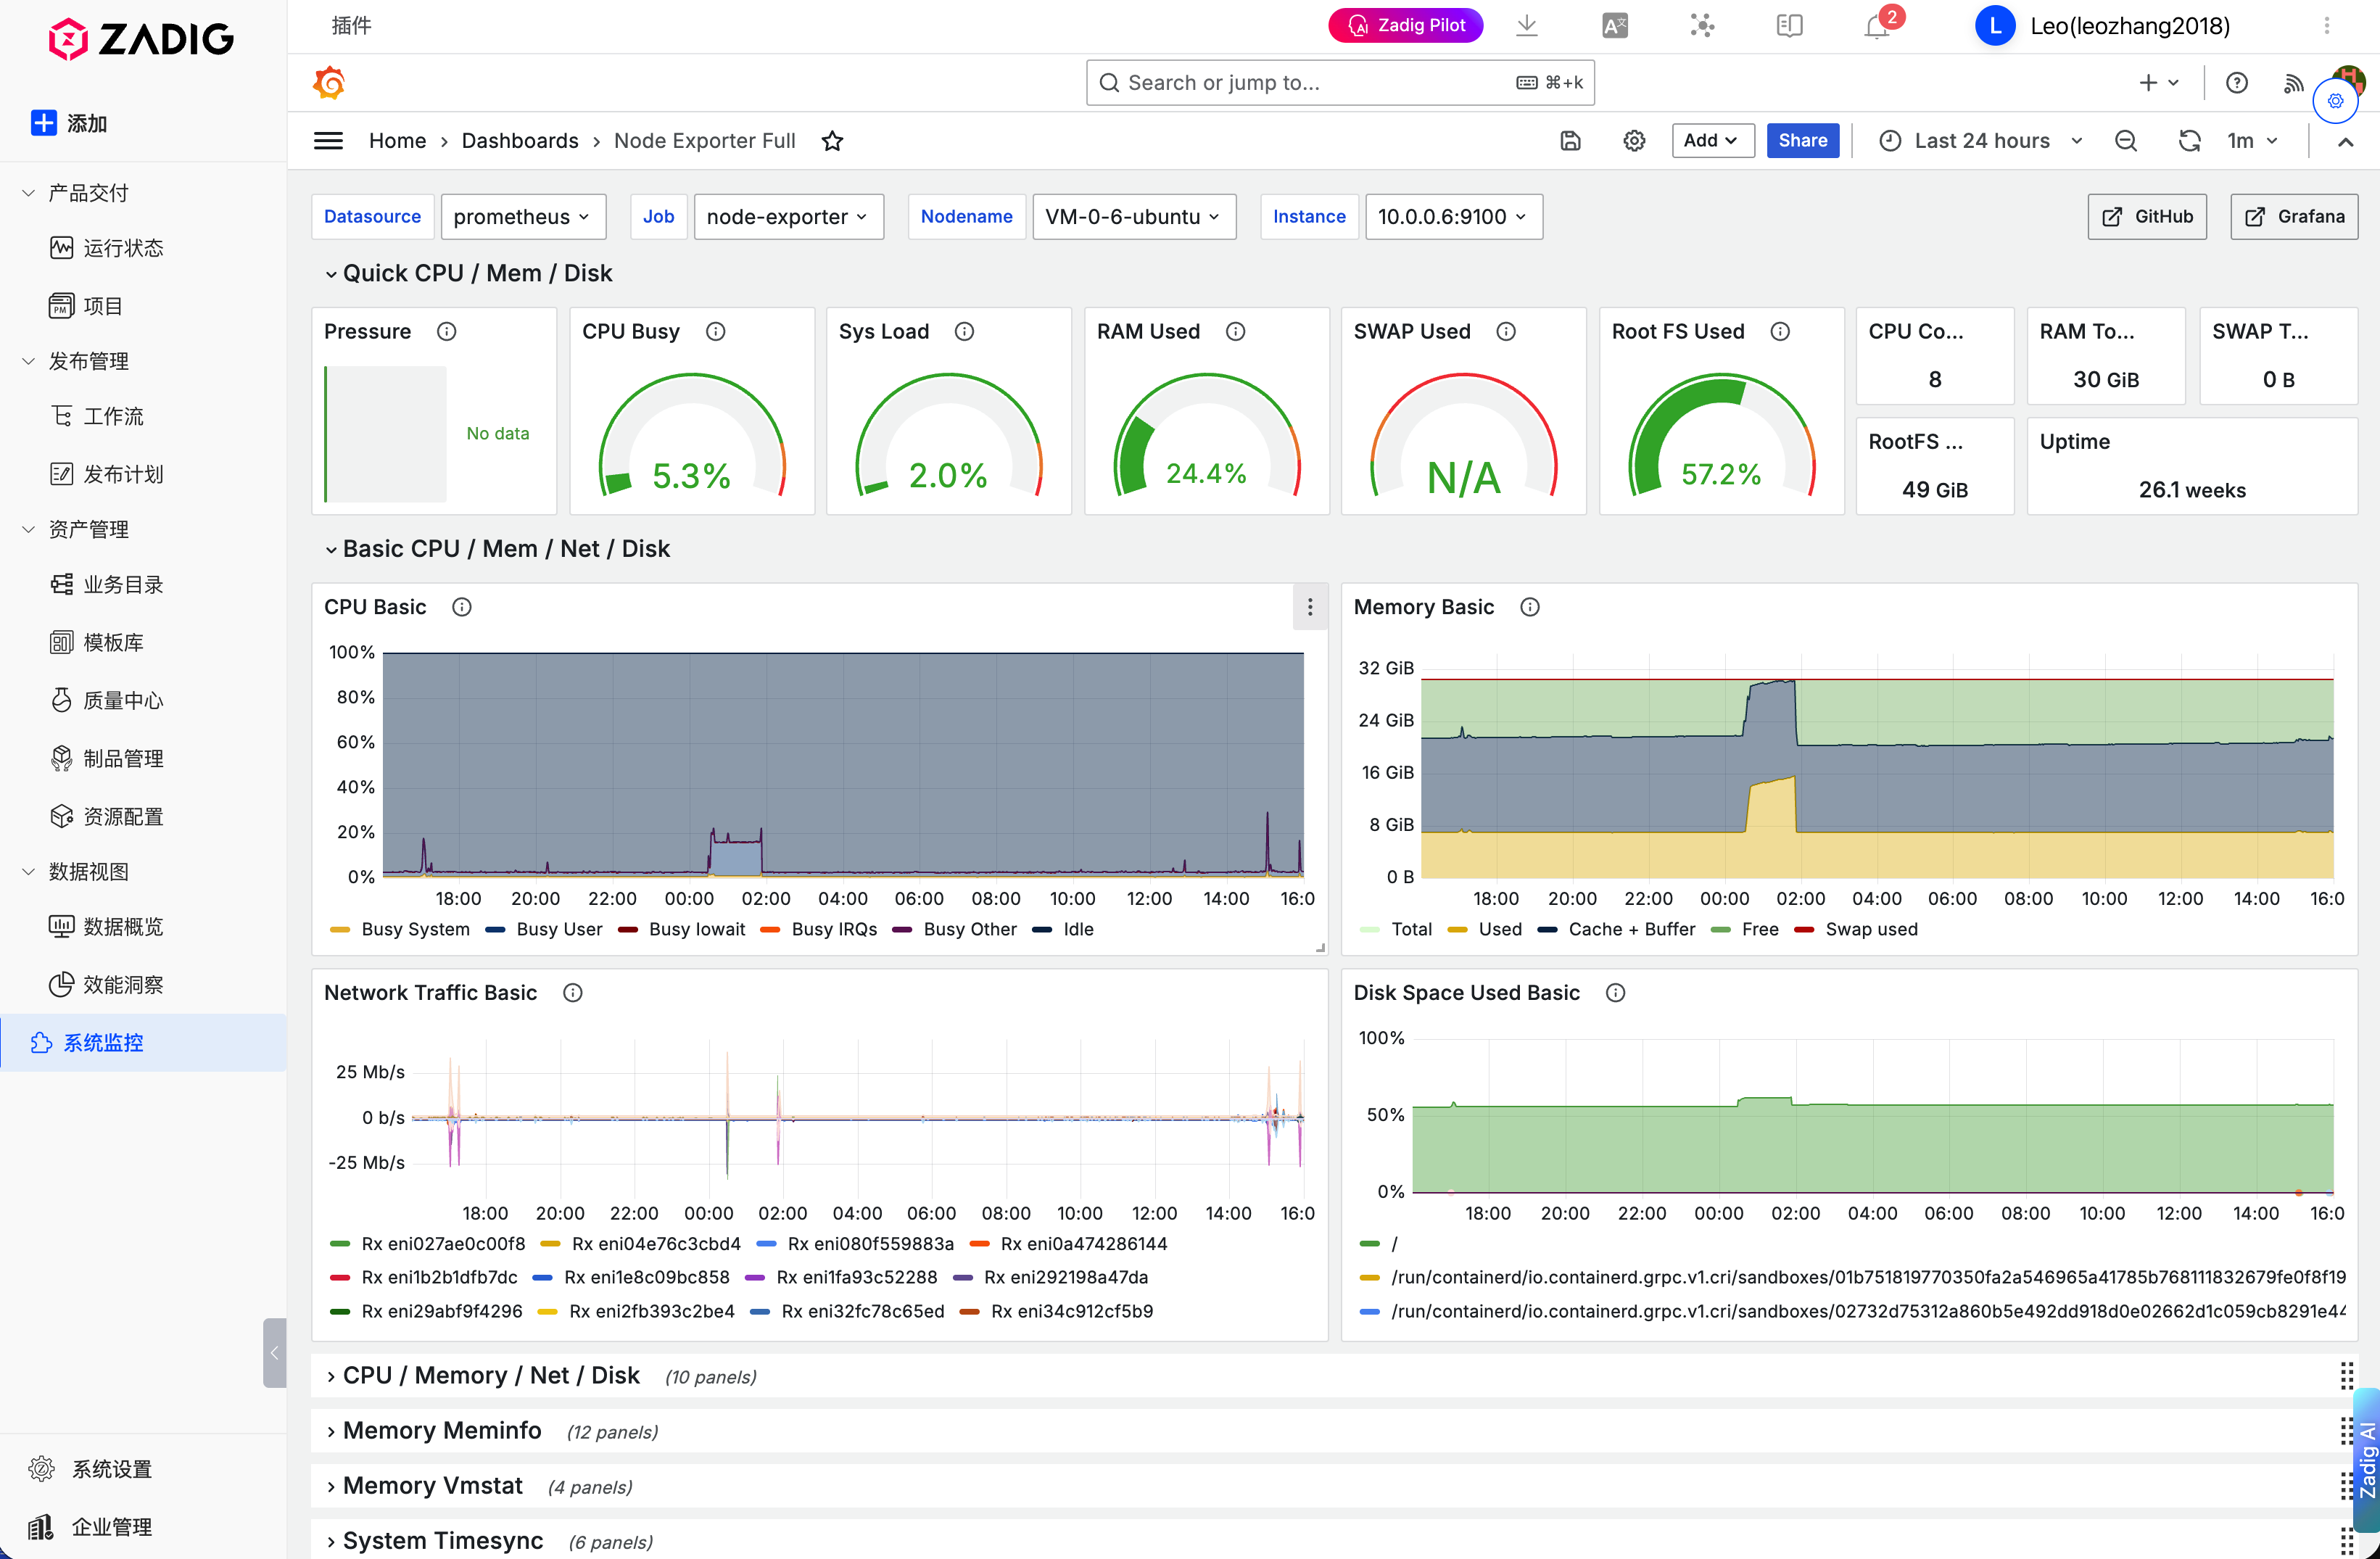
# Scenario 1: Embed Grafana Monitoring Dashboard
Open the plugin page and the config dialog will pop up automatically
Fill in the "Basic Settings" tab:
- URL:
https://grafana.example.com/d/dashboard-id - Title: System Monitoring
- Loading Strategy: lazy
- URL:
In the "Permissions" tab, check:
- Fullscreen
"Security Sandbox" stays off
Click "Save" to view monitoring data within Zadig
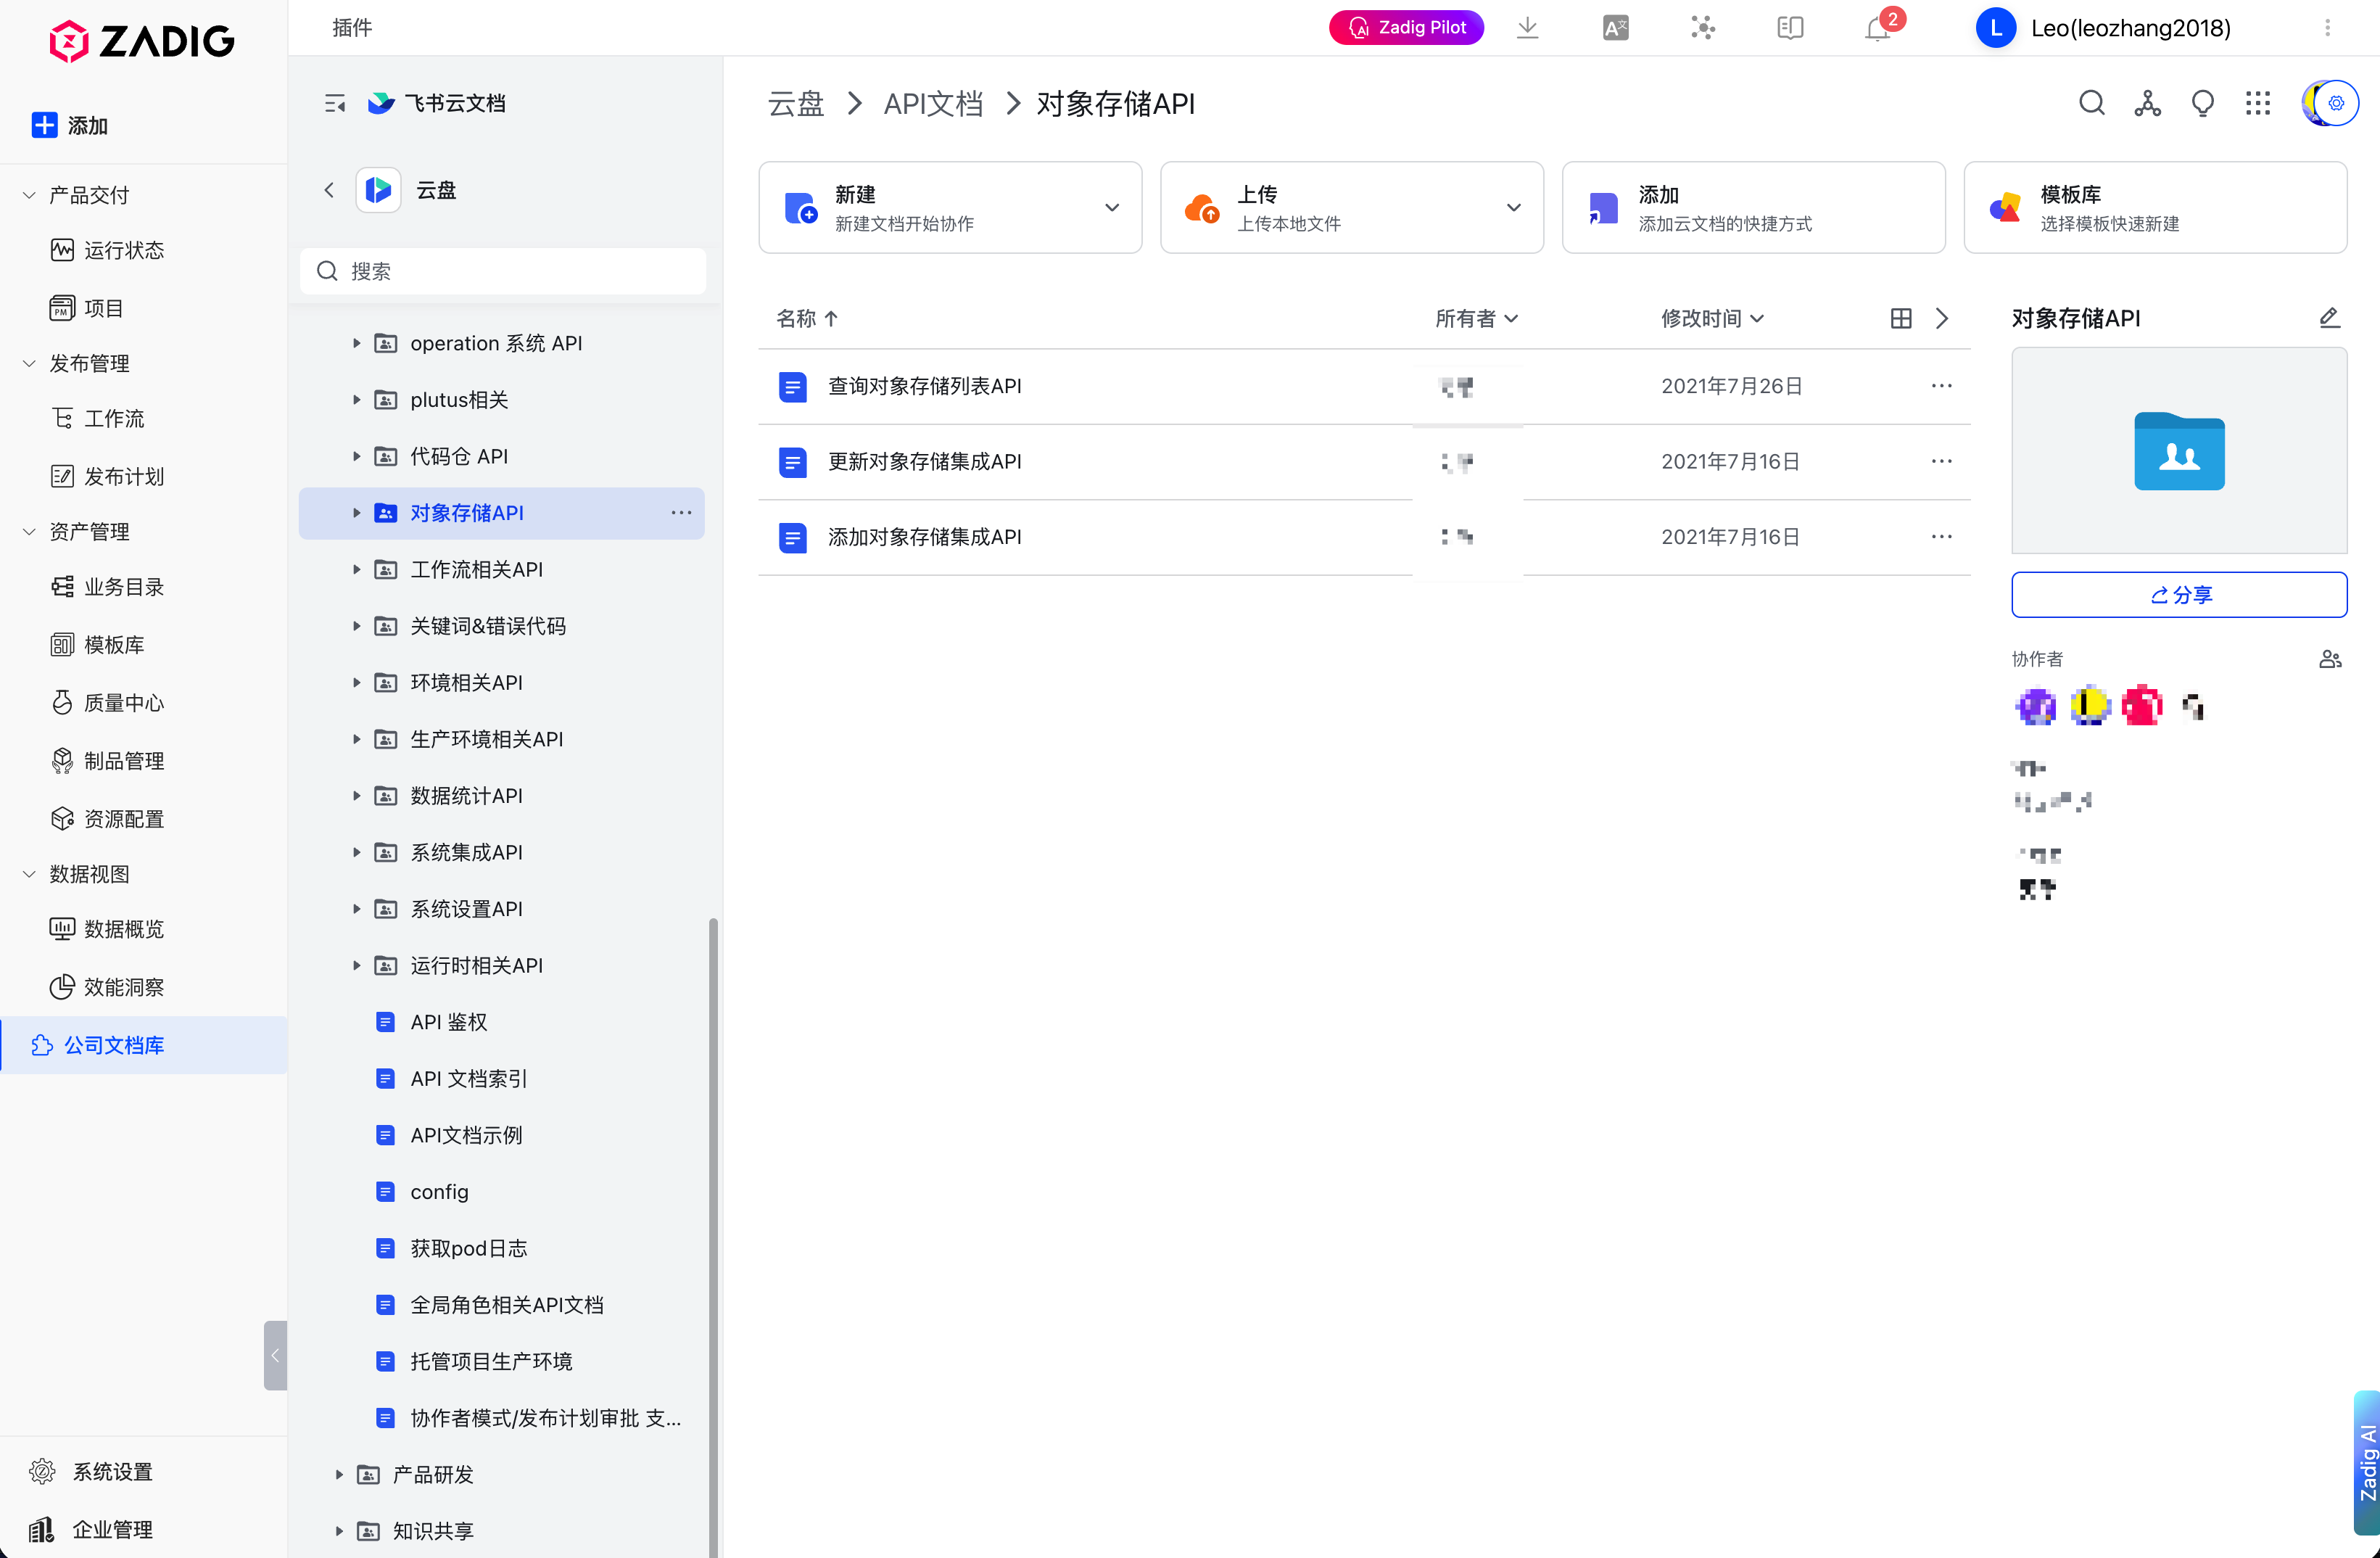
# Scenario 2: Embed Feishu Docs
Open the plugin page and the config dialog
Fill in the "Basic Settings" tab:
- URL:
https://wiki.example.com - Title: Internal Documentation
- URL:
In the "Permissions" tab, check:
- Fullscreen
- Clipboard Read
- Clipboard Write
Click "Save" to view Feishu Docs within Zadig

# FAQ & Solutions
# Q: Why does the iframe show blank or get refused?
A: Possible causes:
- The target website sets
X-Frame-Options: DENYorSAMEORIGIN - Sandbox is enabled but
allow-scriptsis not checked - The URL is incorrect or inaccessible
Solutions:
- Check the browser console for error messages
- Verify if the target site allows iframe embedding
- If using sandbox, make sure to check required permissions
# Q: How can I embed HTTP content into an HTTPS page?
A: Due to browser mixed content policy, embedding HTTP pages in HTTPS context is blocked.
Solutions:
- Upgrade the target system to HTTPS
- Use a reverse proxy to serve HTTP as HTTPS
# Q: How to use different iframe configs on multiple pages?
A: Currently, each plugin instance supports only one config. To embed several different systems, you can:
- Create multiple plugin instances (recommended)
- Modify the plugin code to support multiple configs
- Use navigation tabs in the same plugin to switch between different URLs
# Future Iterations
- Multiple Configs: Support configuring multiple iframe sources and quickly switching via tabs, no repetitive config needed.
- Dynamic URL Parameters: Allow variables (e.g. current user, project ID) in the URL for personalized display.
- Quick Action Bar: Add frequently used buttons (refresh, fullscreen, open in new window) above the iframe for enhanced user experience.
- Communication Bridge: Enable two-way communication between Zadig and the embedded page, supporting data and event interactions.
# 🔜 Conclusion & Upcoming Topics
With this example, you can quickly understand how to build a general iframe integration plugin in Zadig, integrating all kinds of third-party systems into a unified platform. Leveraging the flexibility of the Zadig IDP plugin system, you can rapidly build a unified R&D collaboration portal per your team's needs, reducing tool-switching and improving developer experience.
📦 The sample plugin in this article is open source
See more on GitHub 👉 koderover/zadig-idp-plugins (opens new window)
Next up in this series:
"How to Build a Prometheus + Alertmanager Plugin in Zadig" — creating a unified entrance across systems for integrated R&D collaboration and monitoring.
📌 Follow us for the latest updates and deep dives in the Zadig IDP practical series!


